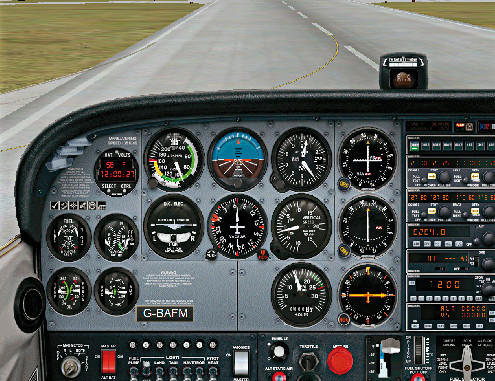
Following our last article on how to use the HSI we have had numerous requests to explain the use of the VOR instrument. Although they both pretty much do the same thing, the VOR requires a little bit more work, in the sense that your heading is dealt with on a different instrument, namely the Directional Indicator (DI). That said, the VOR instrument is fun to learn, and will get you flying more accurately and mindfully So, as with the HSI, here is where you begin…
STEP 1 – TIT
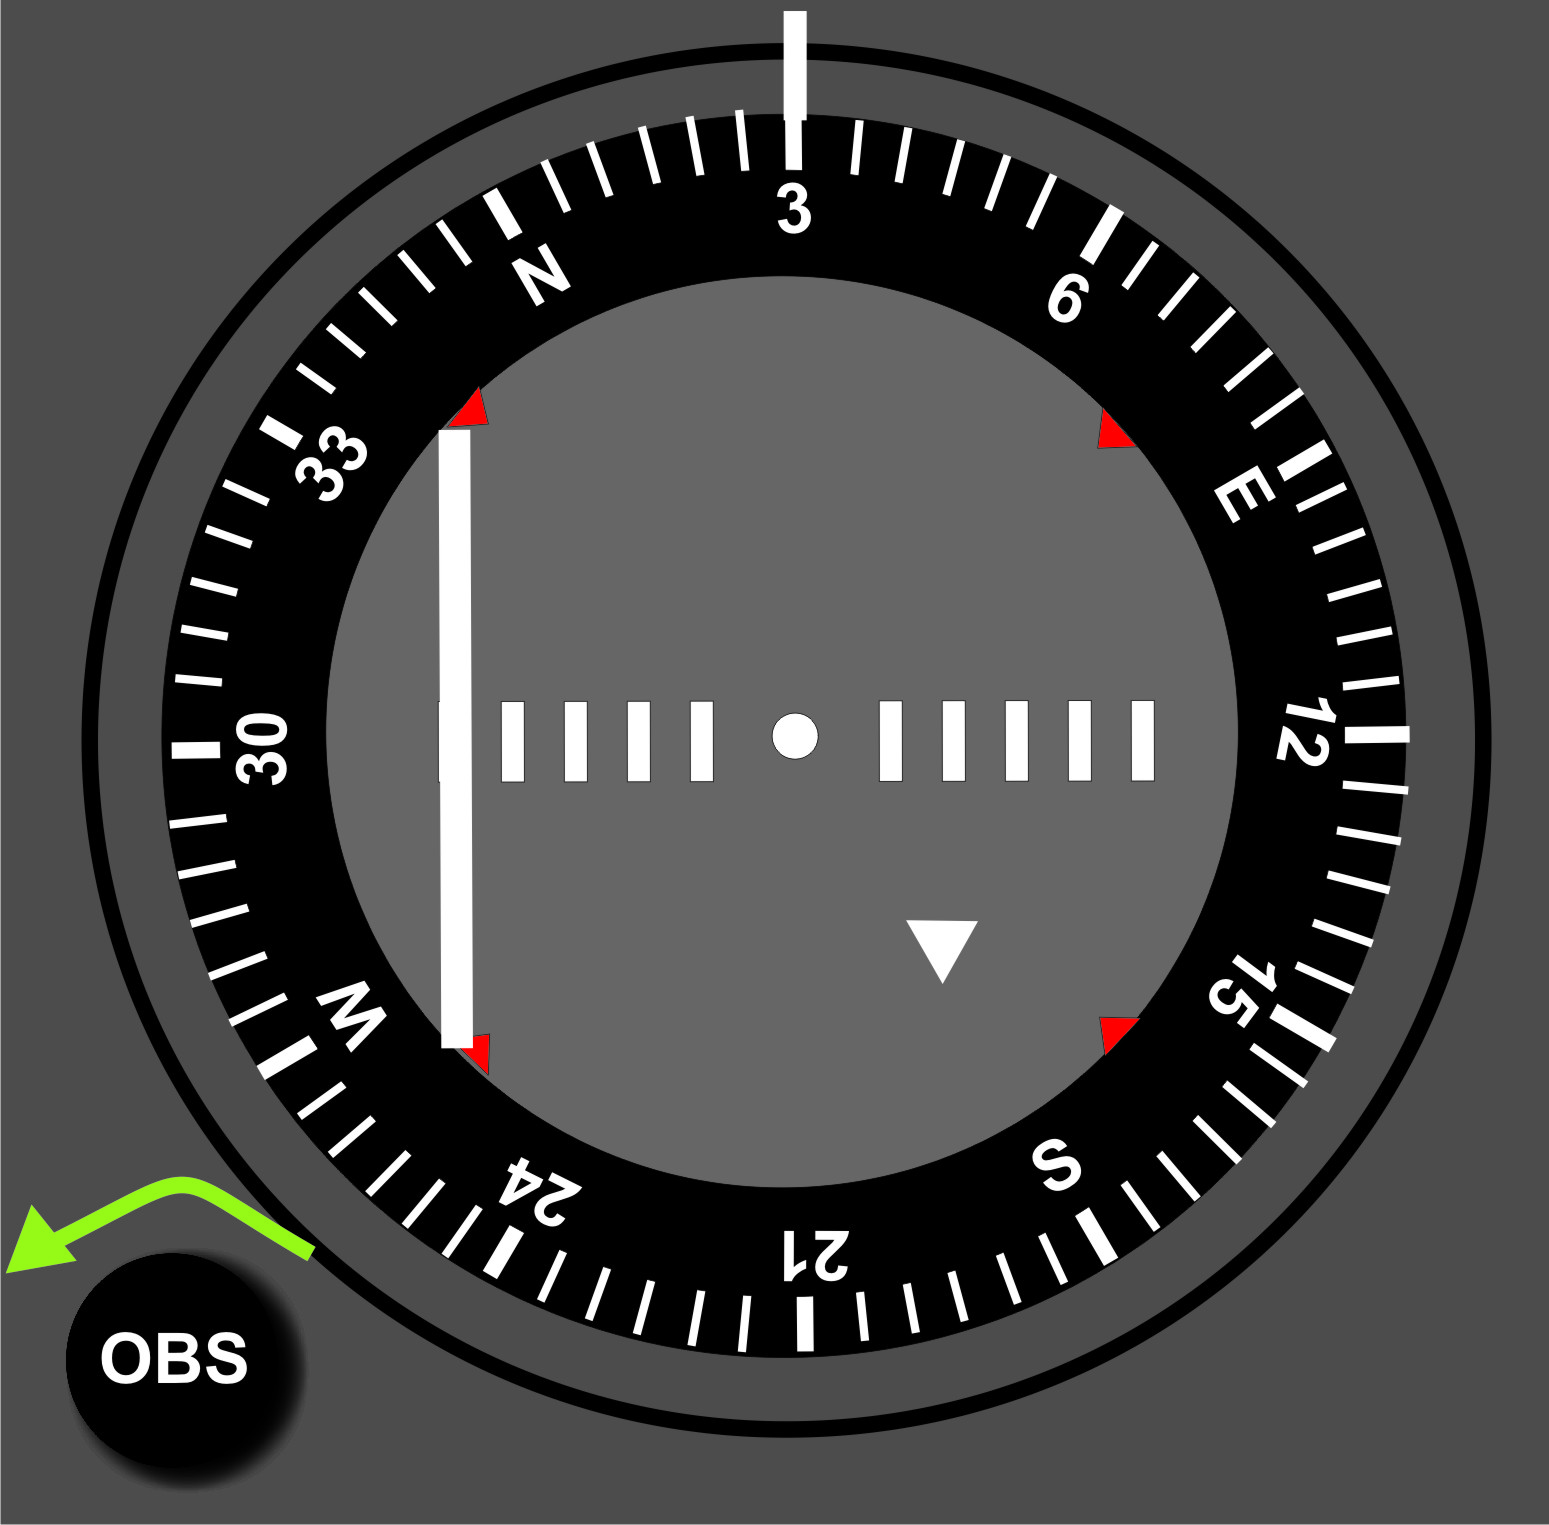
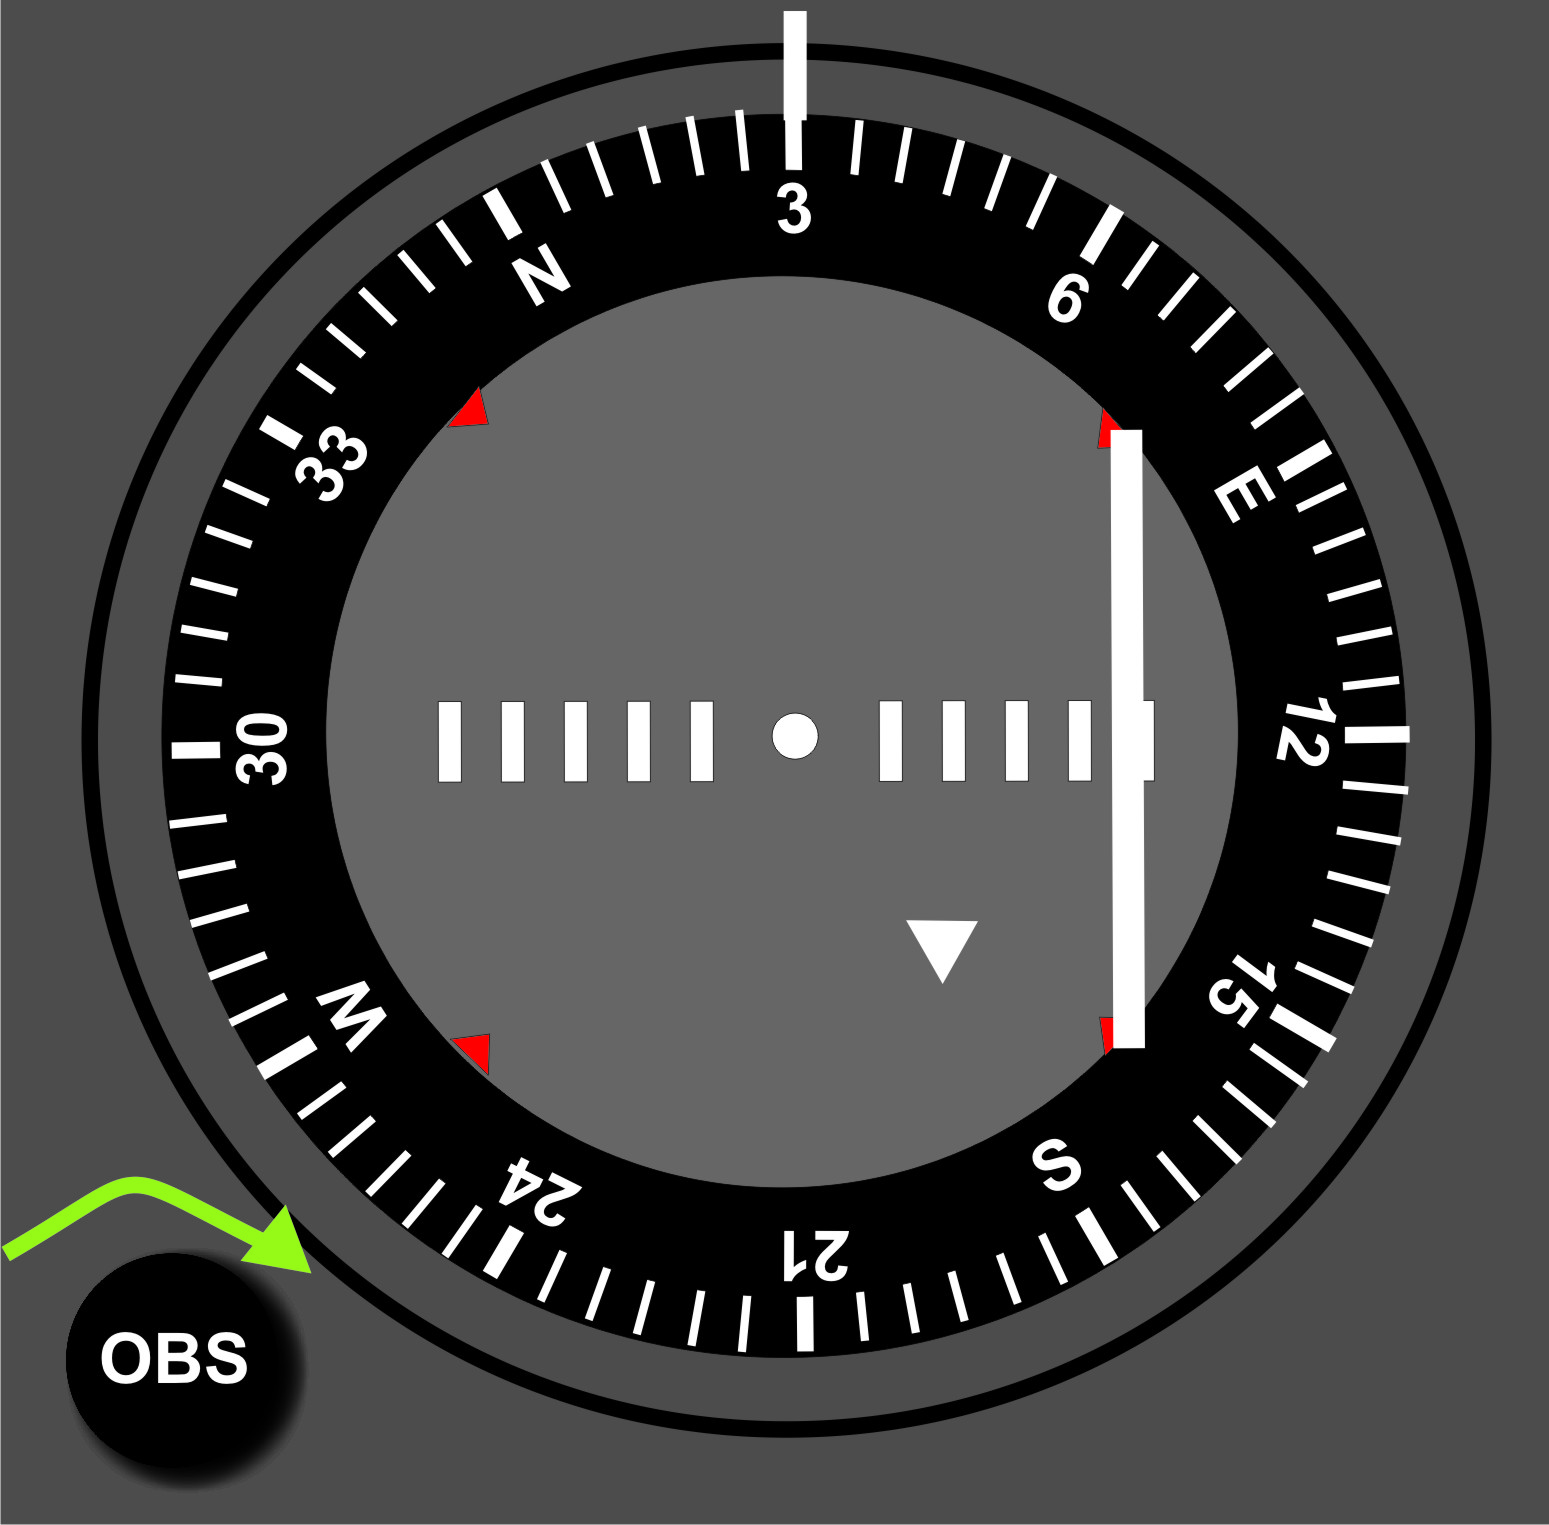
TIT simply stands for ‘TUNE, IDENTIFY, TEST‘. So the first thing you do, is look at your map, find the VOR you want, making sure that you use the symbol guide (don’t use the dotted NDBs), it will usually consist of a 3 letter code. If the frequency is not marked, then you will find it in your aerodrome information publication. Select the ‘NAV‘ option/button on your radio, and tune in the frequency, making sure it is set as the primary frequency. Next, press ‘IDENT‘ and you should hear a Morse code signal, compare this to the dots and dashes indicating the VOR on your chart to make sure that you have tuned in the correct frequency. To test, you simply turn the OBS knob (the left one) to the left 10 degrees, and then to the right 10 degrees, this will indicate that it is functional.
STEP 2 – WHERE ARE WE?
You firstly need to imagine a bicycle wheel, with the VOR as the central hub, and then 360 spokes (degrees) emanating from it. Each ‘spoke’ is called a radial, and it radiates outwards from the centre. This means that if we are overhead the VOR, and we fly away from it, with the CDI needle aligned on one of those radials, in no wind, our heading will be the same number as the number at the top of our VOR instrument. Regardless, if we want to know where we are, we need to centralise the CDI needle by turning the OBS knob. The important thing to note here, is that, if the white ‘FROM‘ arrow/flag is showing (it will point to the bottom of the instrument), then we are flying away from the VOR. If we are going towards the station, then the CDI needle will centralise with the ‘TO’ arrow pointing to the top of the instrument.
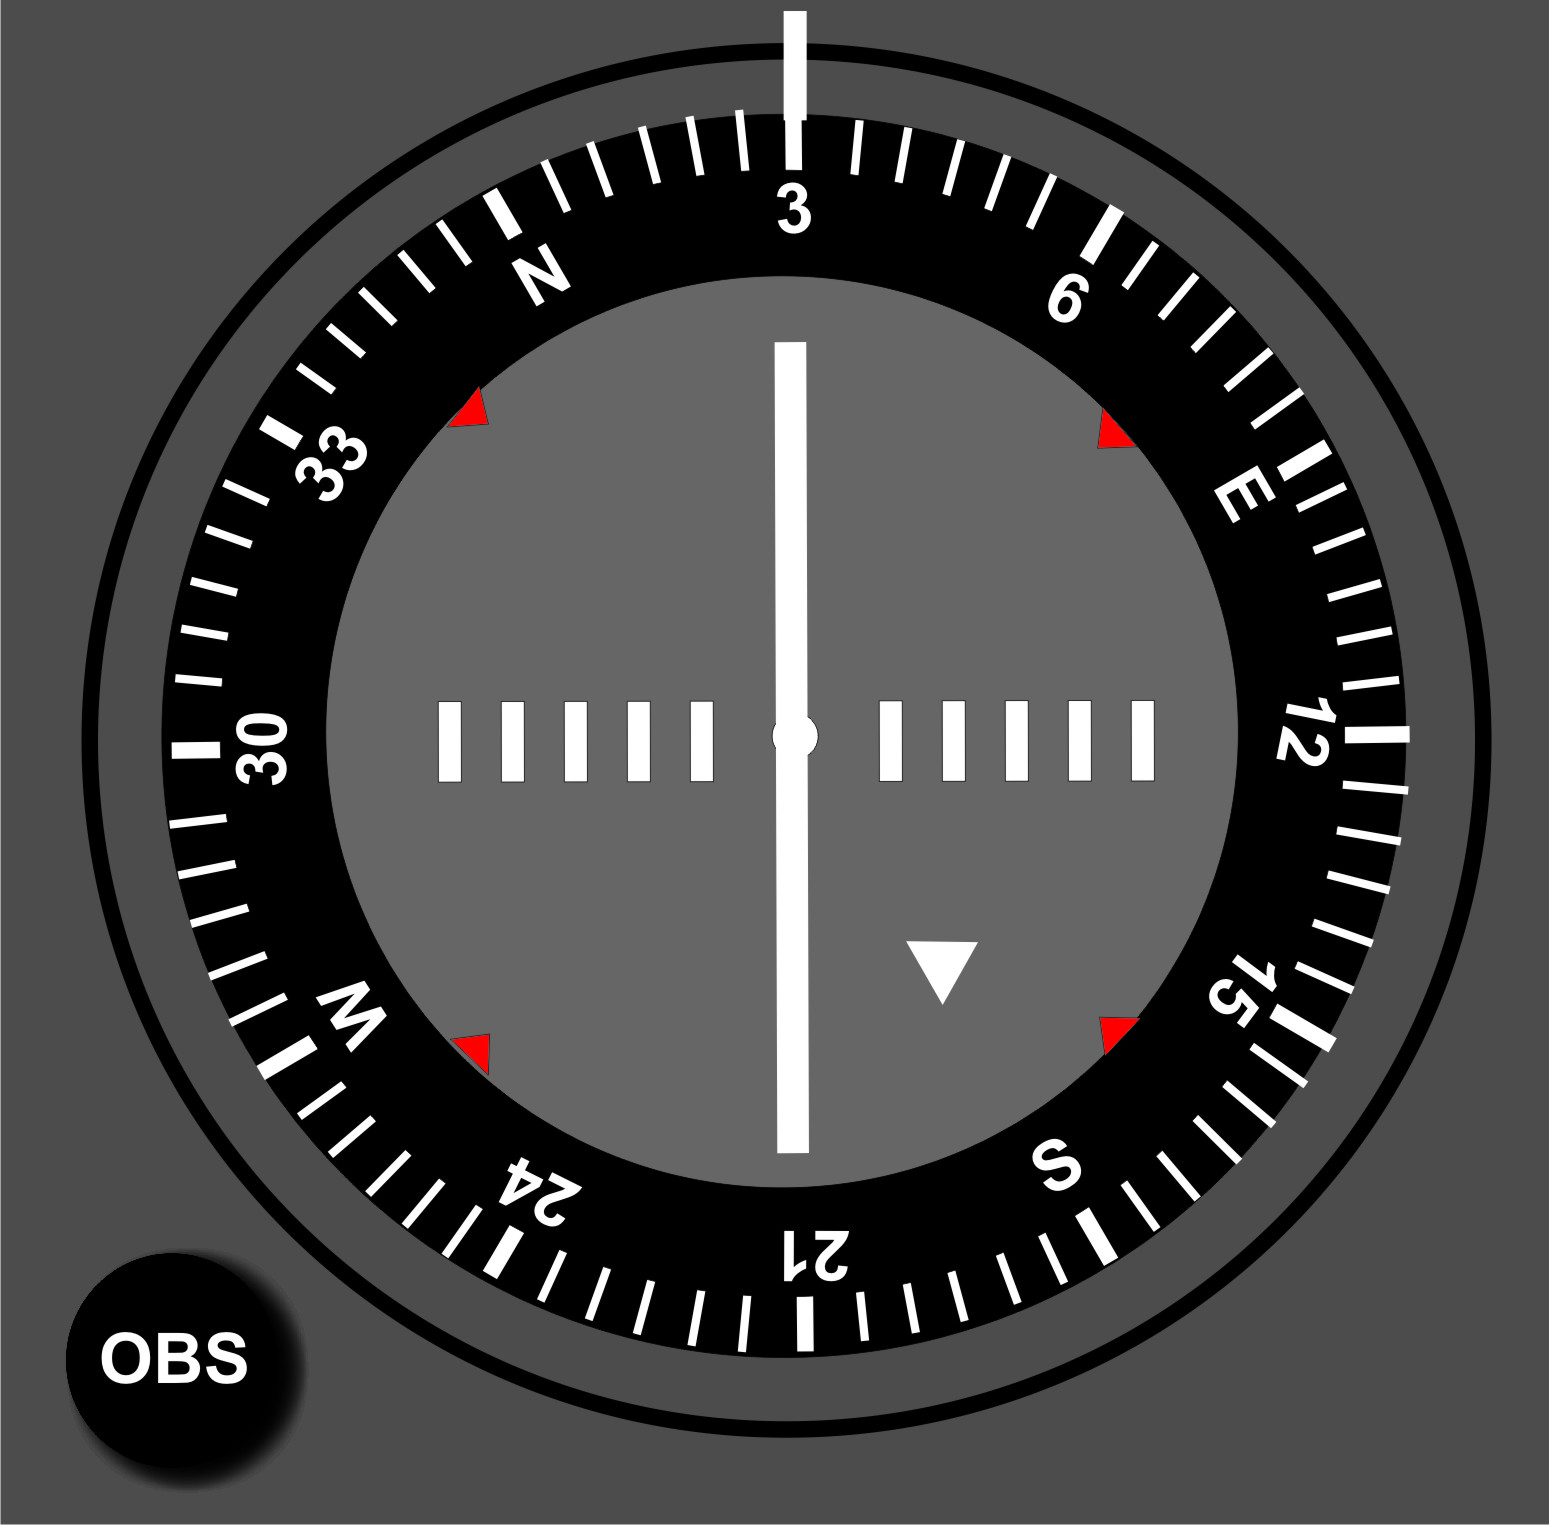
FROM – The needle has been centralised (by turning the OBS knob) with the FROM flag showing. We are flying on radial 030° away FROM the VOR station.
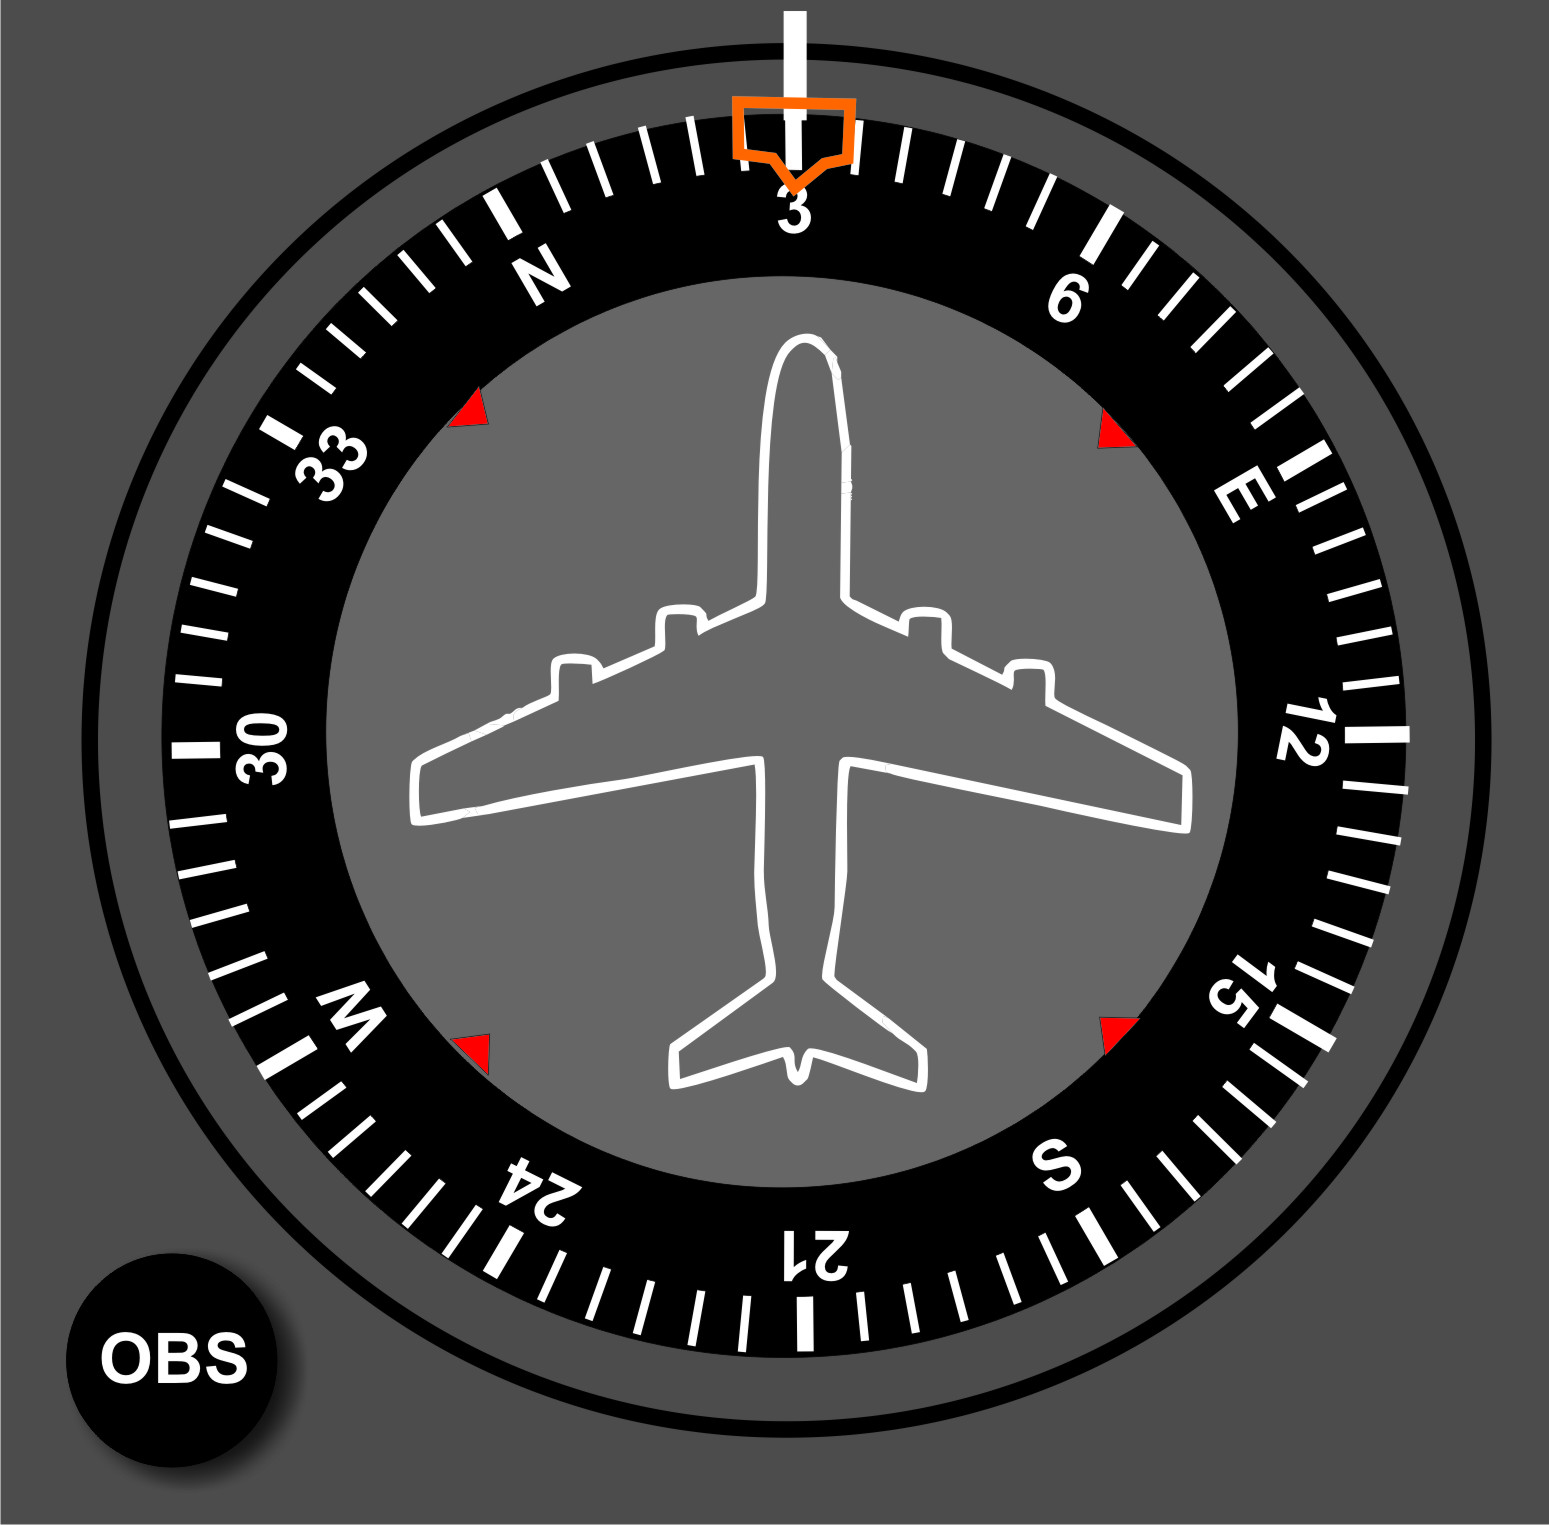
FROM – In no wind conditions, our heading bug on the DI will indicate that we are flying a heading of 030° (the same number as our radial) away FROM the station.
However, when we are going TO the station, we are not flying on the number of the radial (which goes away from the beacon), but rather 180 degrees opposite to the number of the radial i.e. the reciprocal. So the heading bug on our DI will read the reciprocal number (and heading TO the station once aligned), and the bottom of the needle tells us what radial we are on. Radials do not change direction, they always stay FROM, so when the CDI is aligned with the TO flag showing, the BOTTOM of the needle tells us what radial we are on, and the TOP tells us which heading we are flying to maintain that radial, and get TO the station.
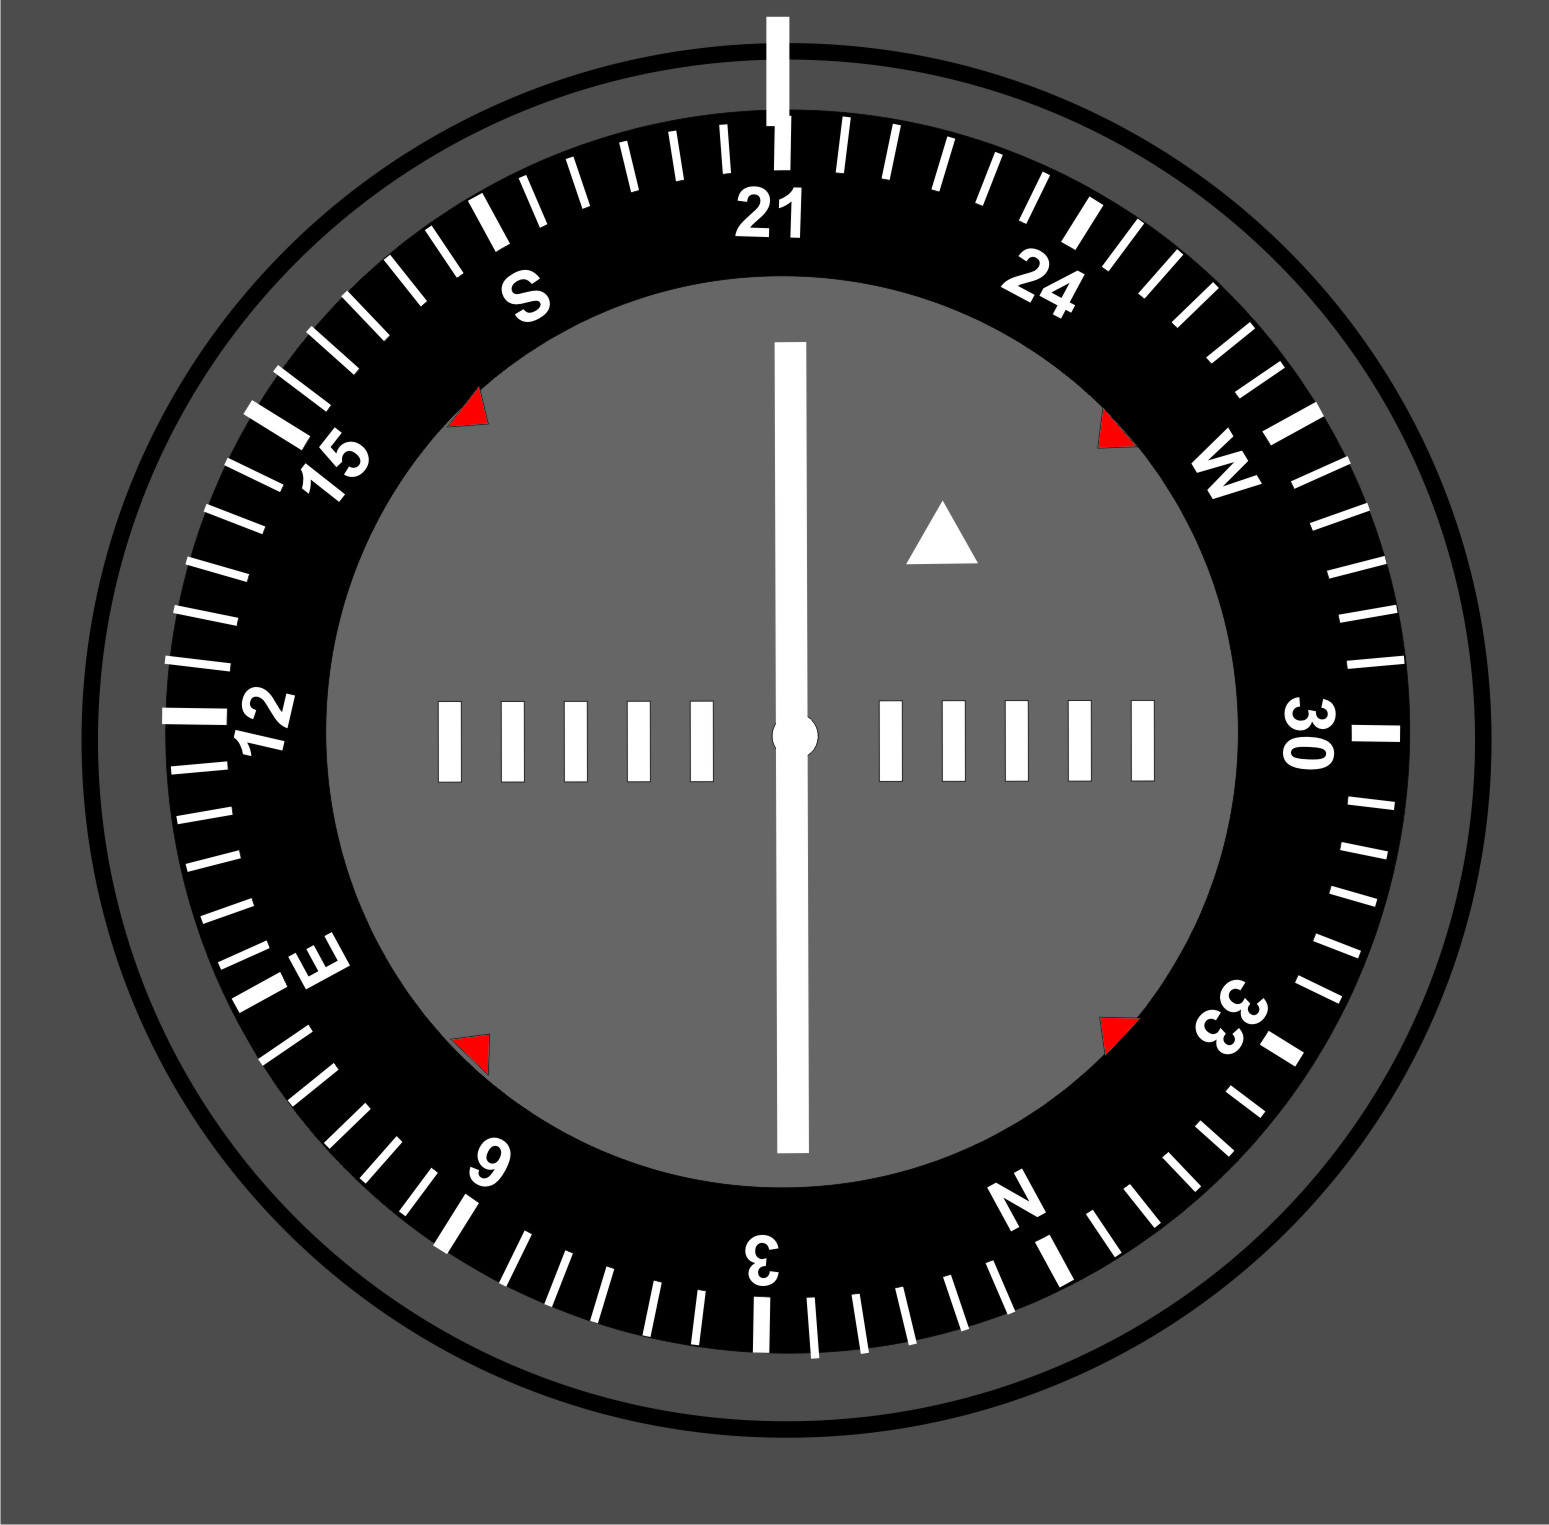
TO – The needle has been centralised (by turning the OBS knob) with the TO flag showing. We are flying on radial 030° (indicated at the BOTTOM) TO the VOR station.
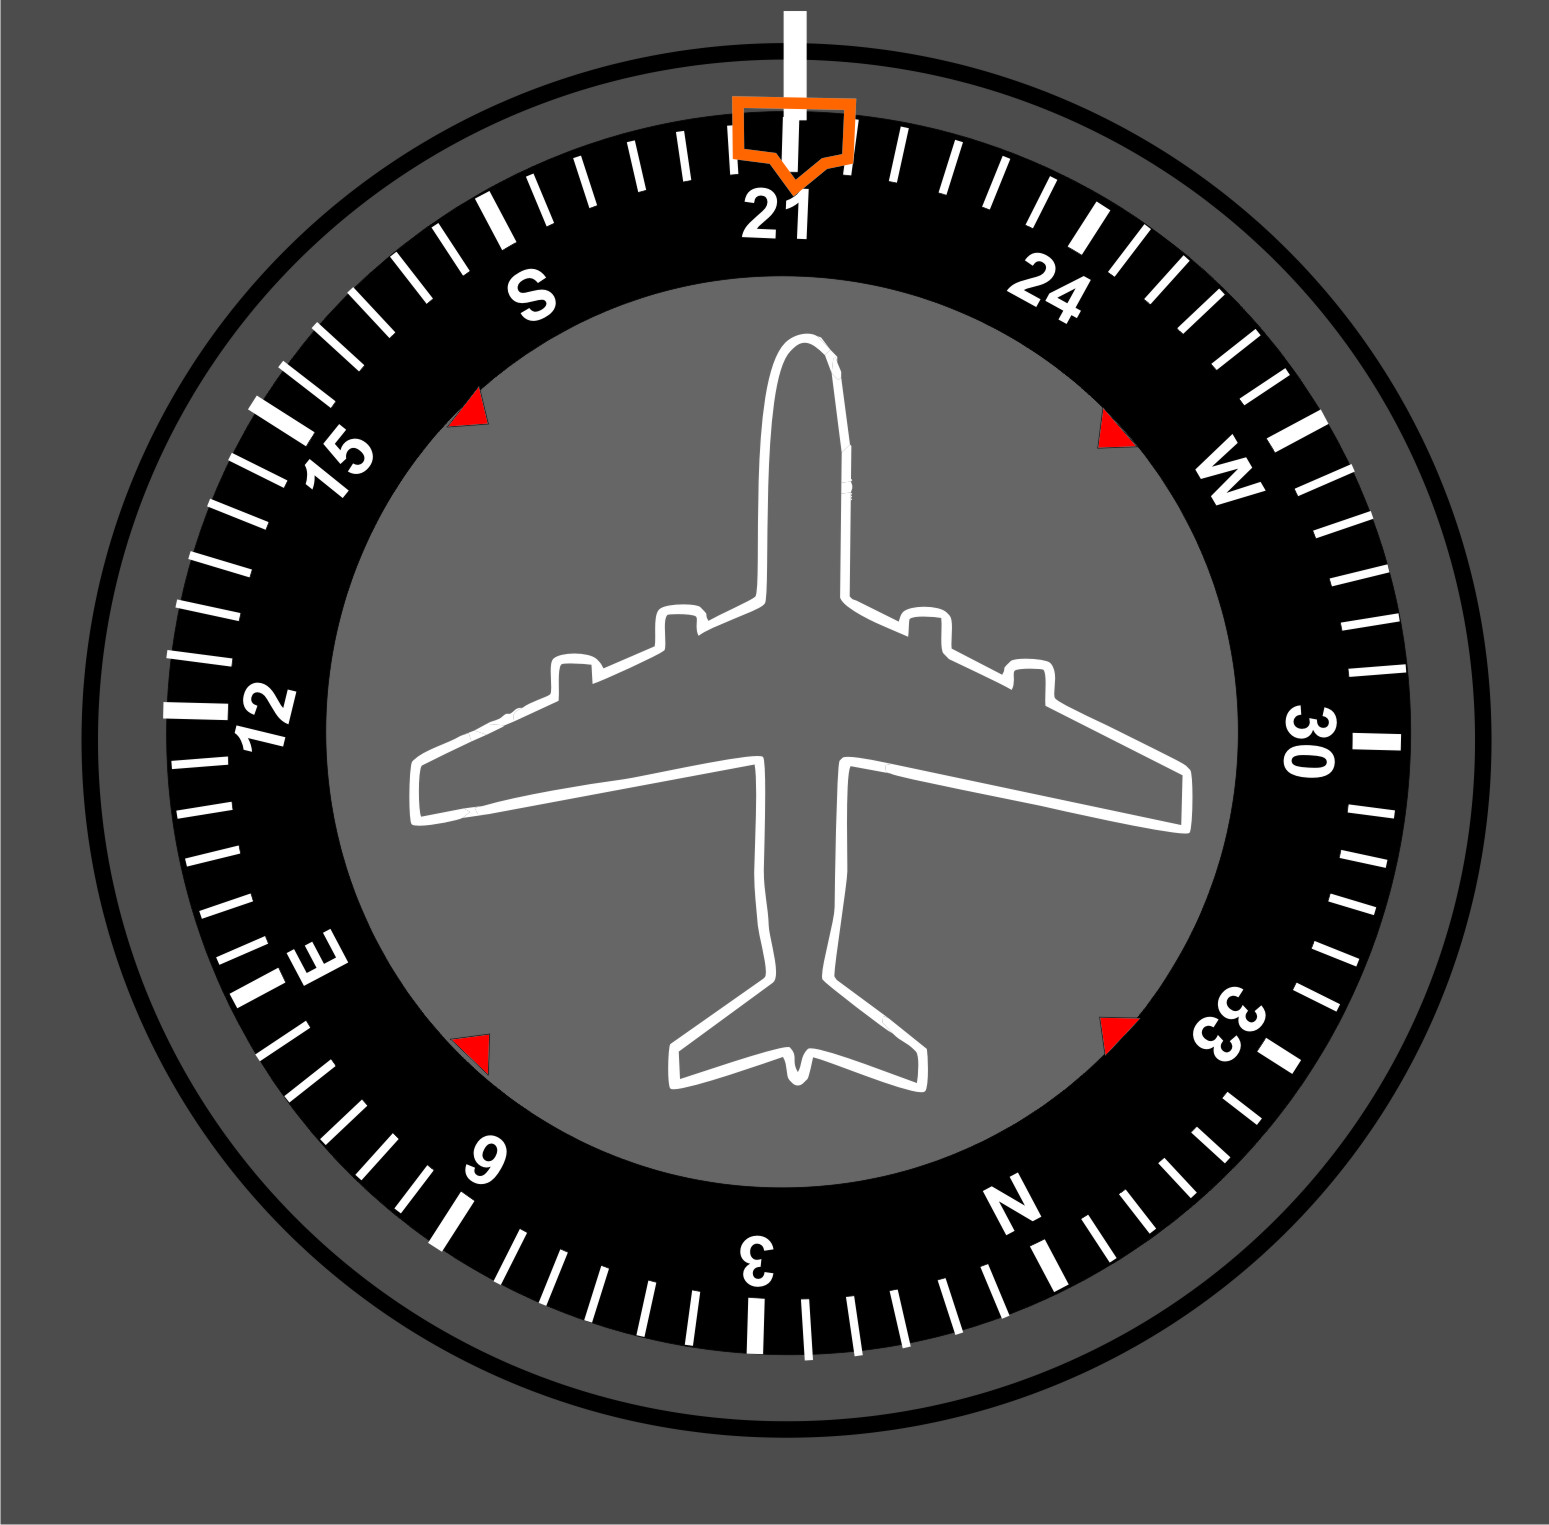
TO – In no wind conditions, our heading bug on the DI will indicate that we are on a heading of 210° to get TO the station.
STEP 3 – WHERE DO WE WANT TO GO?
If, we would like to fly on a specific radial from our current position we would most probably need to intercept it. For example, we are now entering controlled airspace, and we are told by ATC to intercept radial 060° TO the station. REMEMBER! We are now wanting to go TO the station, so we need to set the desired radial of 060° at the BOTTOM with a TO flag showing. The number 240° which is at the top indicates the desired heading to follow (once we have the needle centralised) to be on this radial. Our current heading is 210°, which is to the left of our desired heading of 240°, so the CDI needle will separate and move left to show us that we need to fly RIGHT in order to intercept the radial. If the needle were to move to the left, then the CDI would be telling us to fly RIGHT. Now, we cannot simply turn right until we have 240° under the heading bug of our DI, as then we would simply fly parallel along side the desired radial. So we now have to first intercept the radial, get on it, with a centralised needle on the VOR before we can even consider flying a heading of 240°.
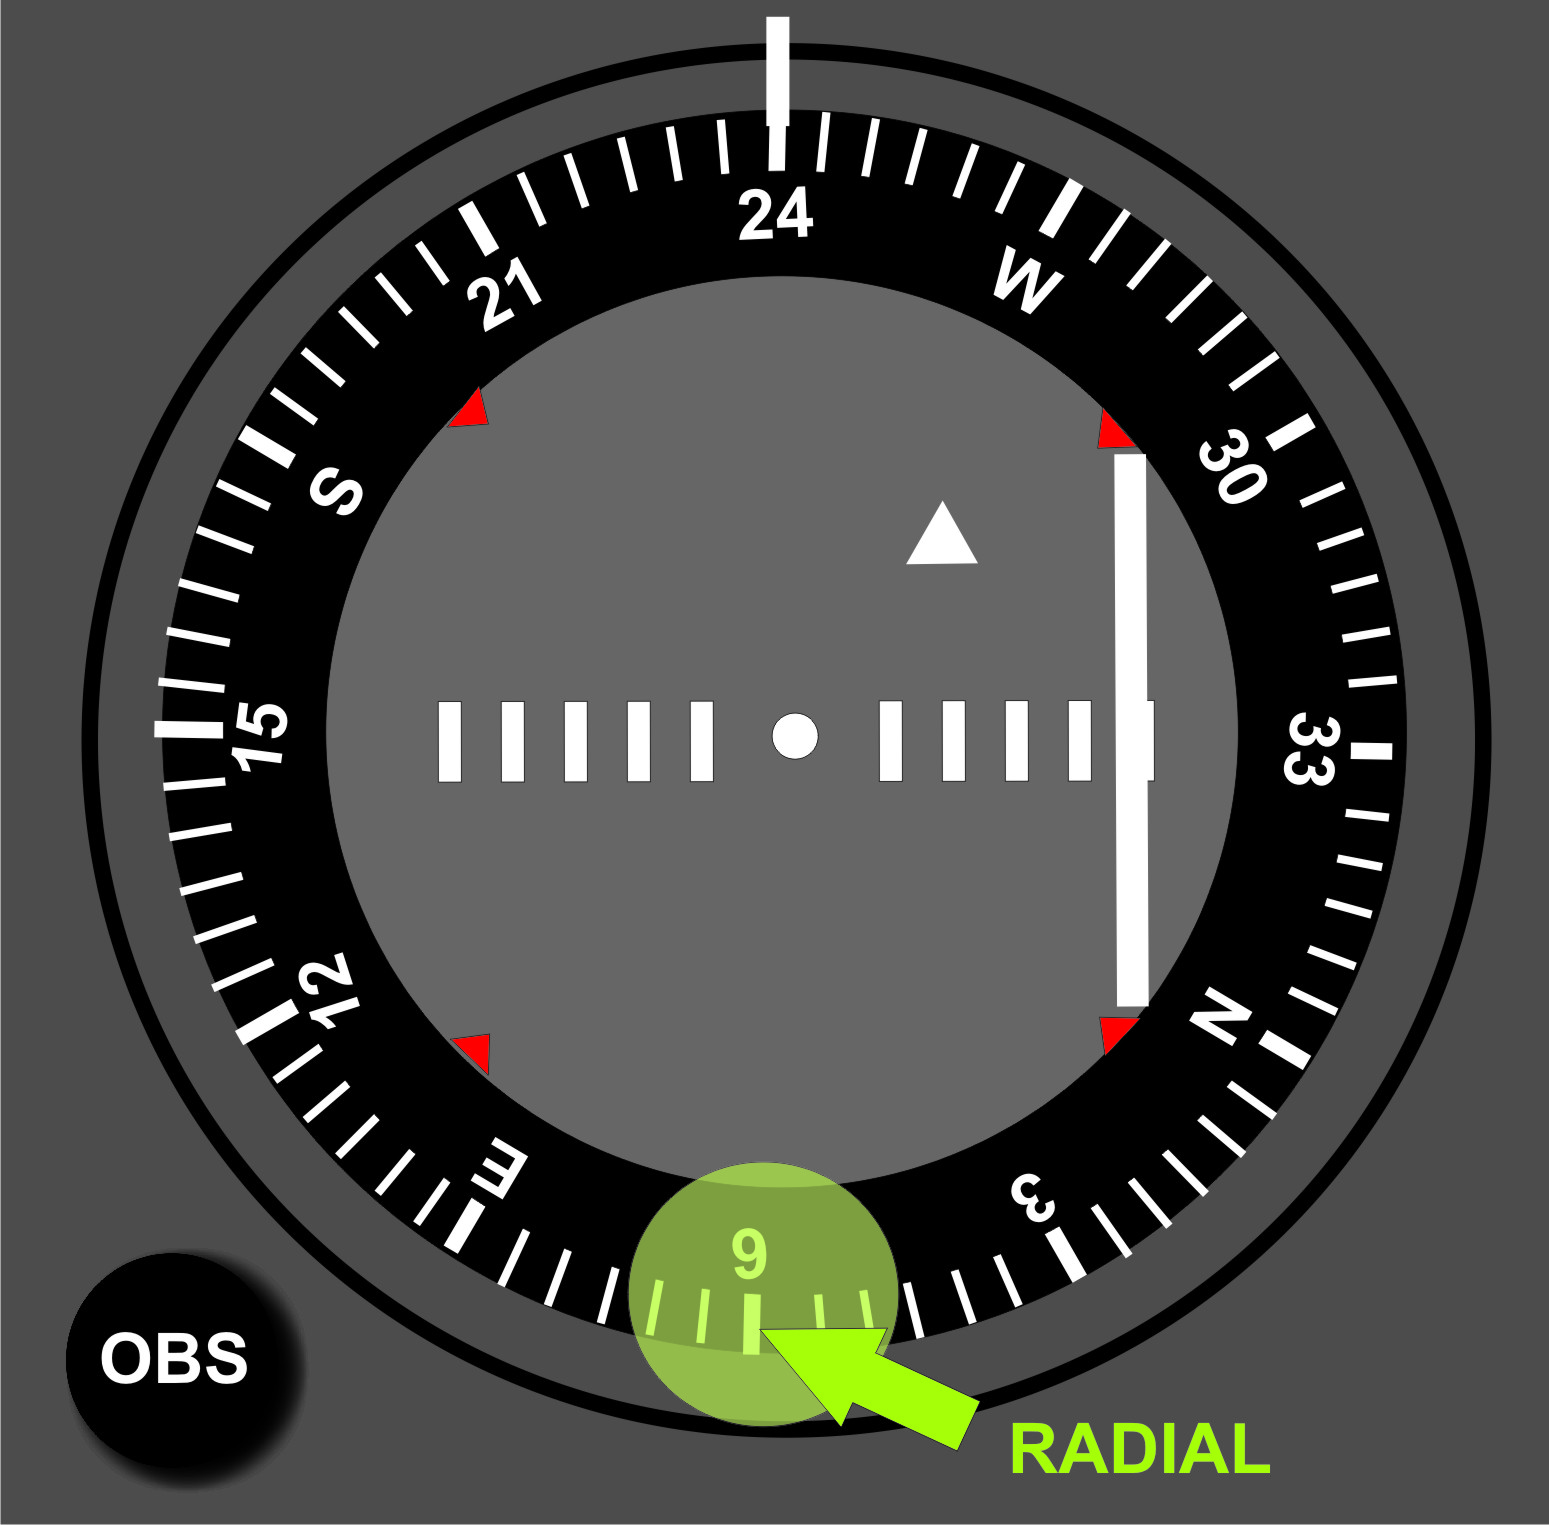

STEP 4 – HOW TO INTERCEPT THE RADIAL
The intercept angle that we choose to get to our desired radial, is affected by how far away we are (if we are very far then the angle will be greater, as the further we are away from the station, the wider the gap grows between the radials). However, I am going to show you an easy way that you can do this visually without having to do too much tedious maths.
Firstly, determine if you are going TO or FROM the station, then eliminate the half of the VOR that does not apply to you, in this case we are going TO the station, so we can forget the bottom half
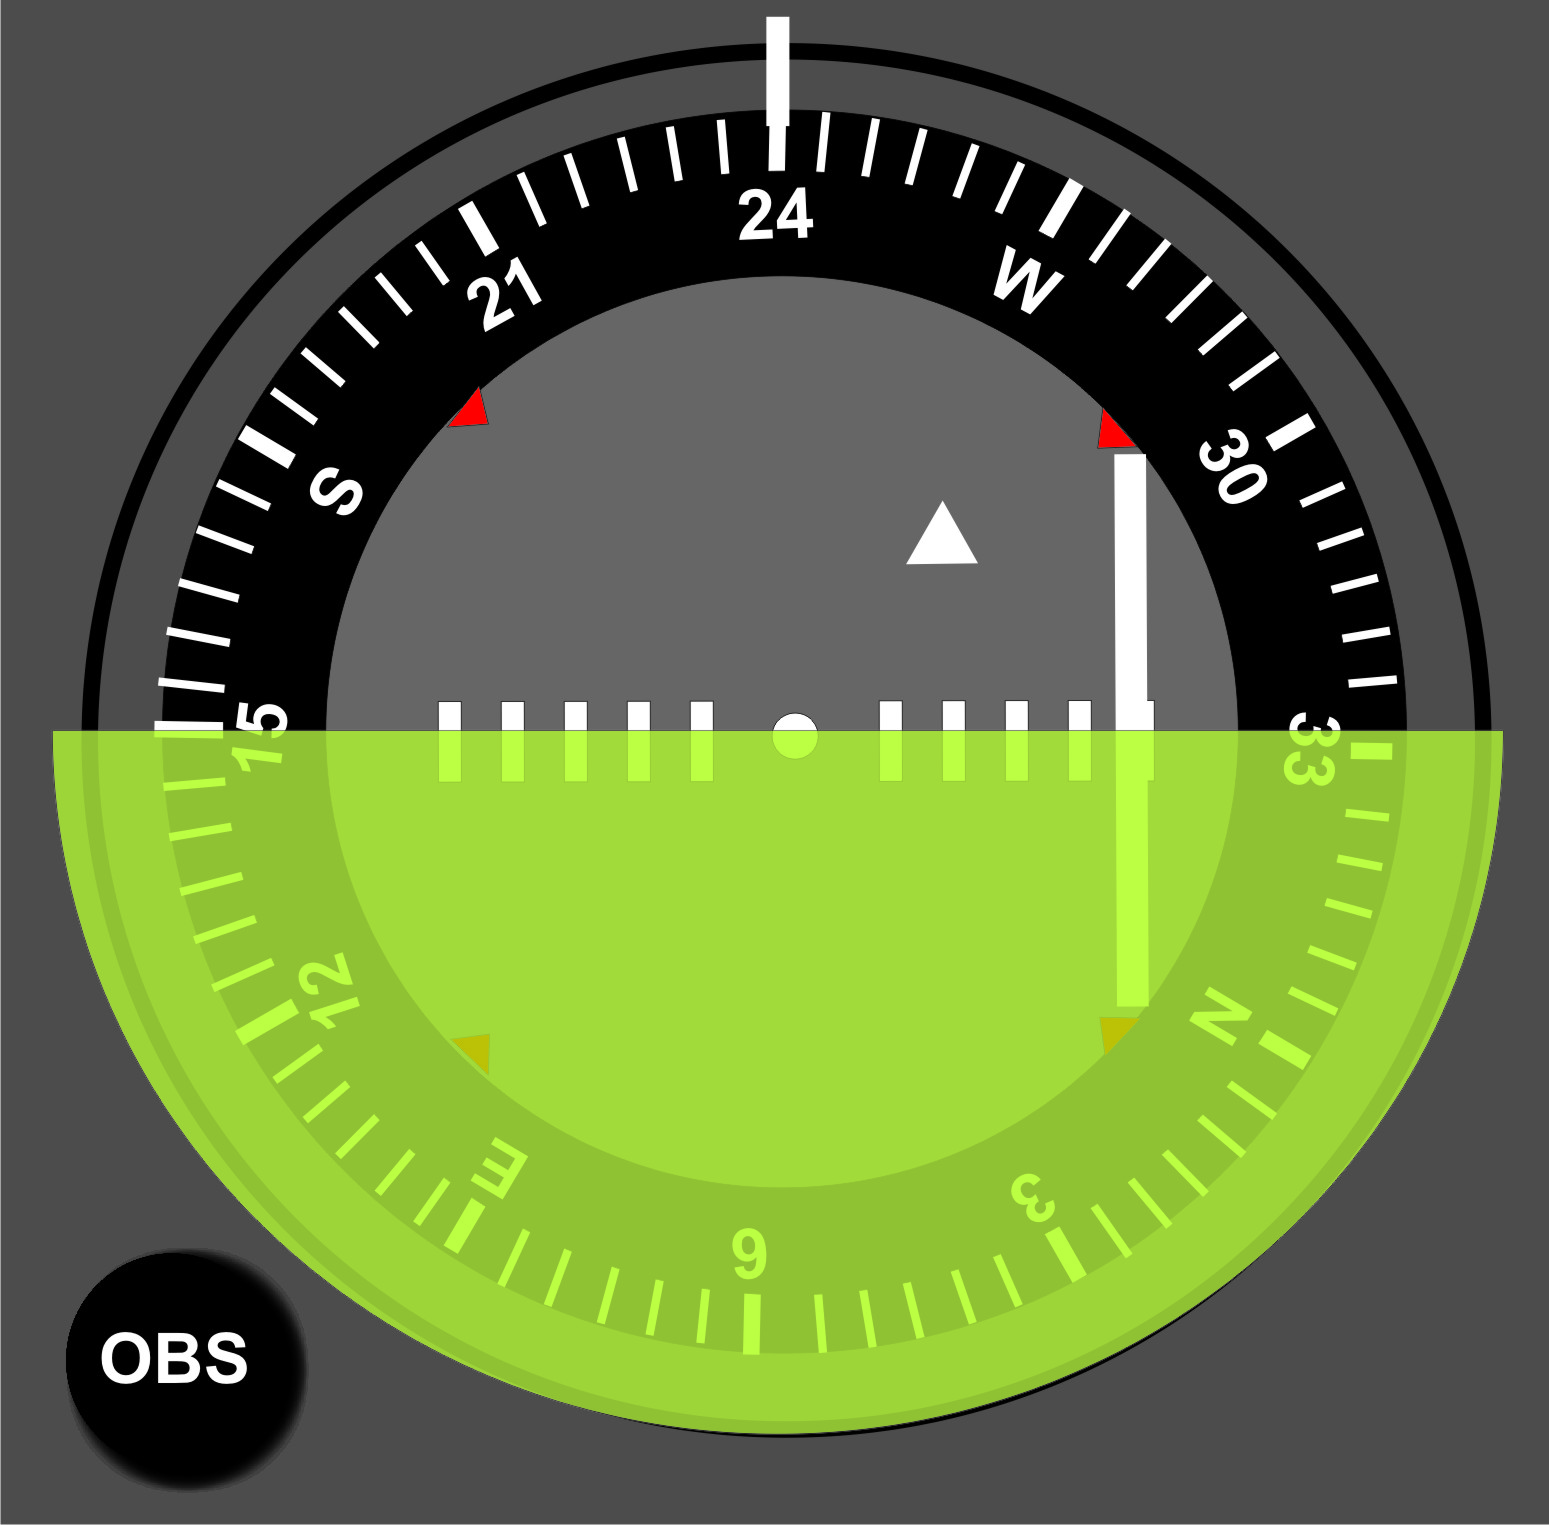
Eliminate the half of the VOR that does not apply – If you are going TO, our intercept heading will be in the top half so we can ignore the bottom half.
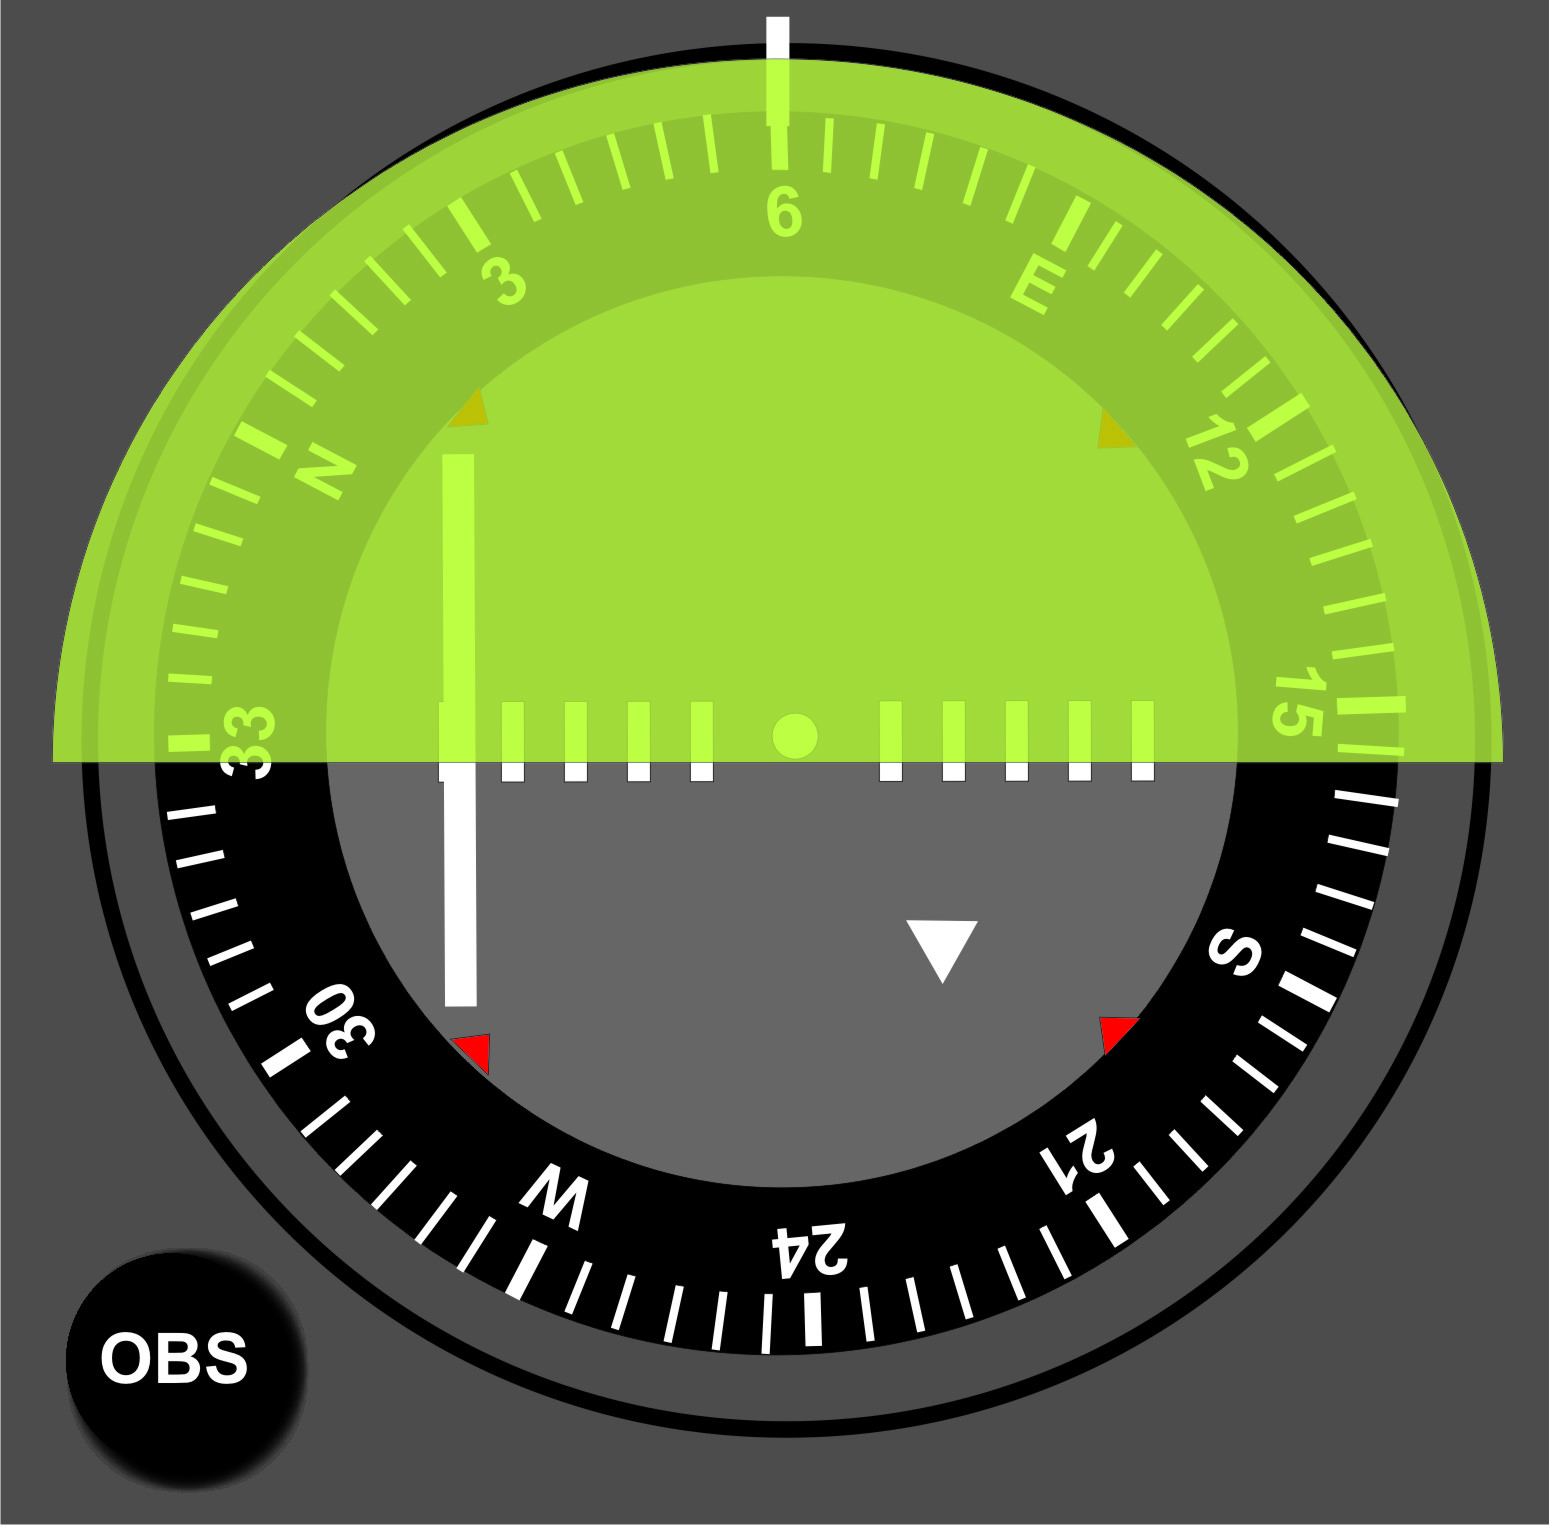
Conversely, if we were going FROM the station we would ignore the top half.
Next, we look at where the needle wants us to fly – in this case, it is instructing us to fly right, so we can now eliminate the top left quarter. We can now determine that our intercept heading is somewhere in the top right quarter.
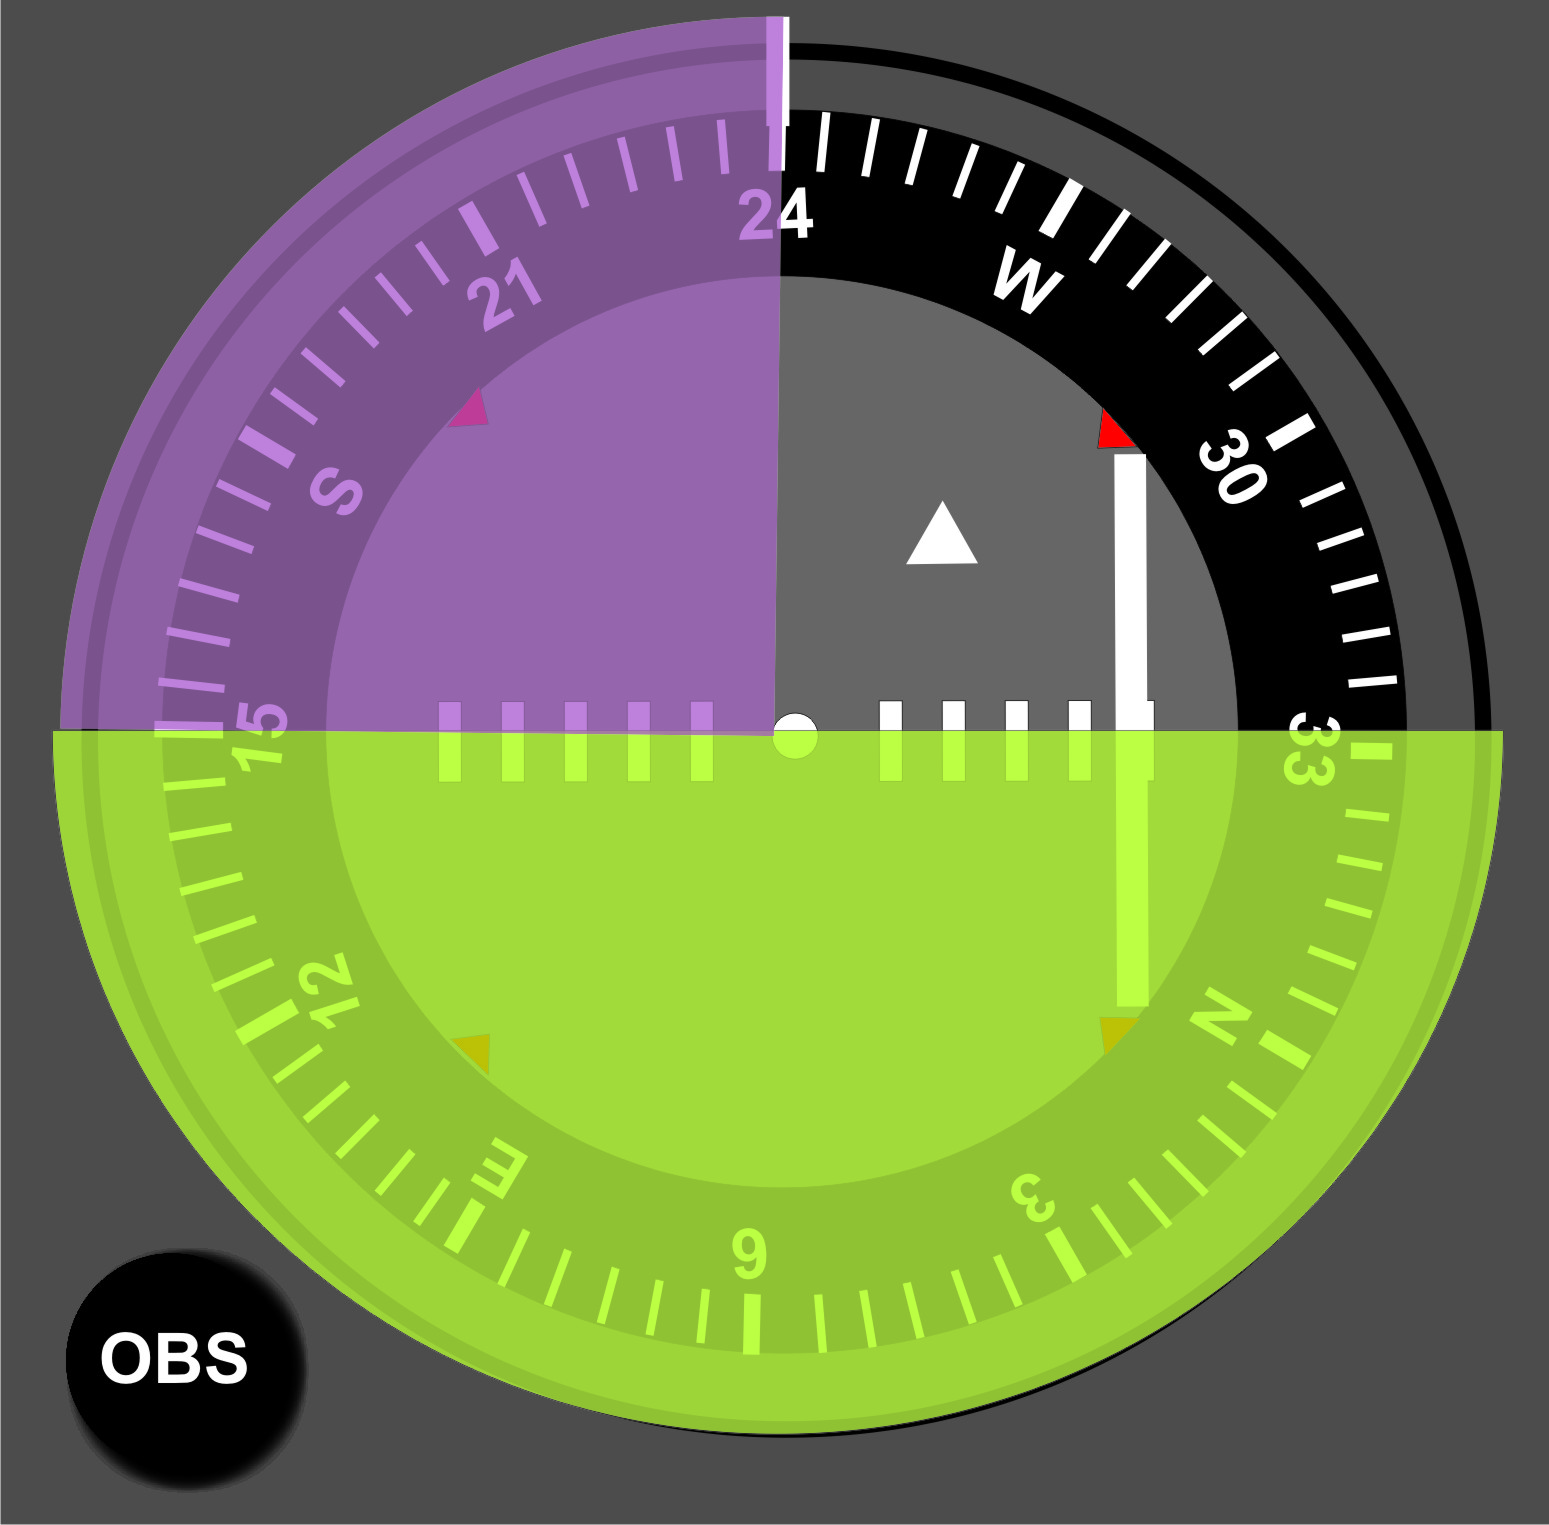
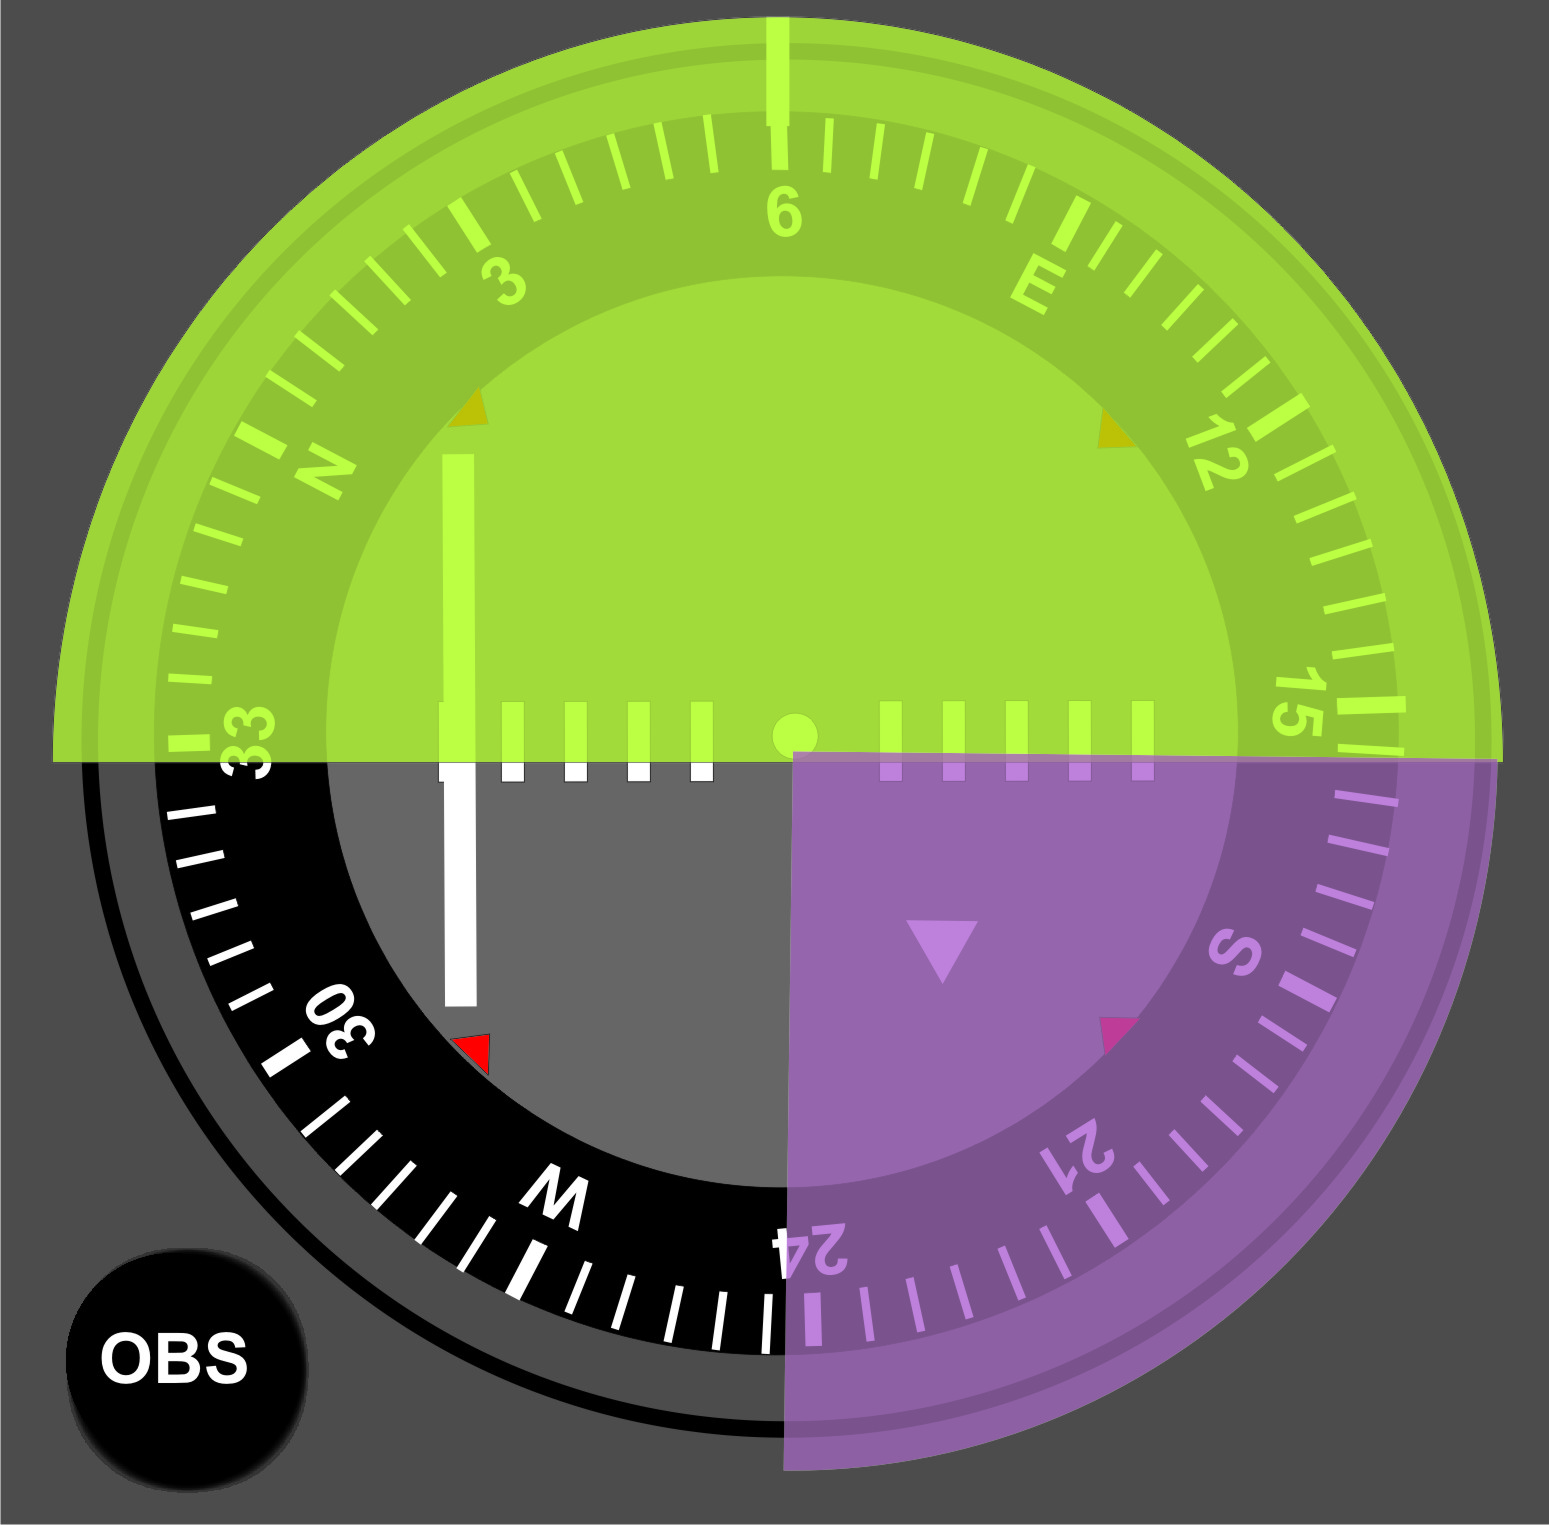
So now we know in which quarter to choose our intercept heading. Generally, 30 – 45° angle works well, and in this case let us assume we are 5NM away, so we will choose a 45° intercept (conveniently marked with the little red notches on the VOR instrument), which gives us a heading of 290°. You can now set the heading bug on your DI to 290°, and turn onto this heading.
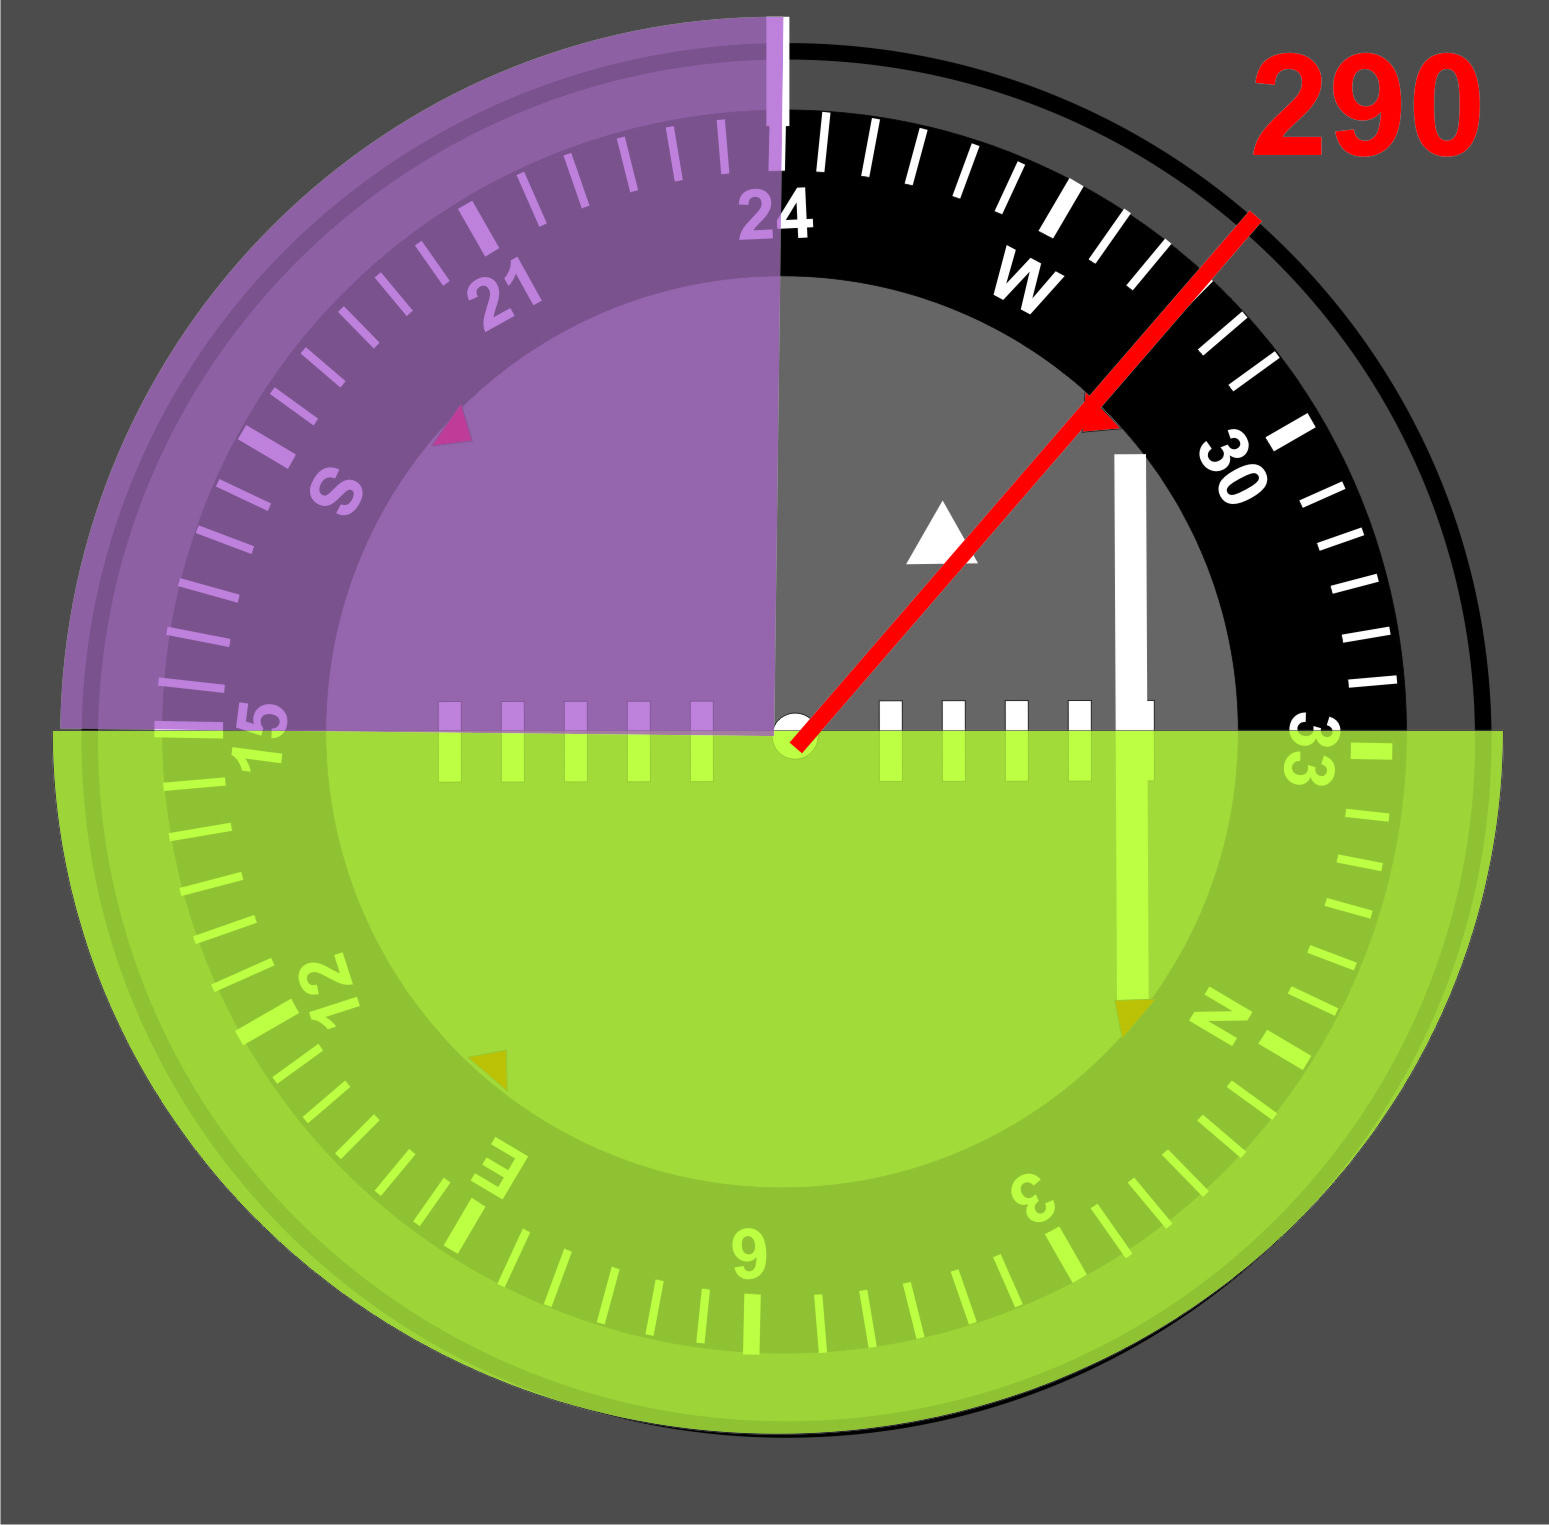
Select your intercept heading from this sector. In this case a 45° intercept gives us a heading of 290°.
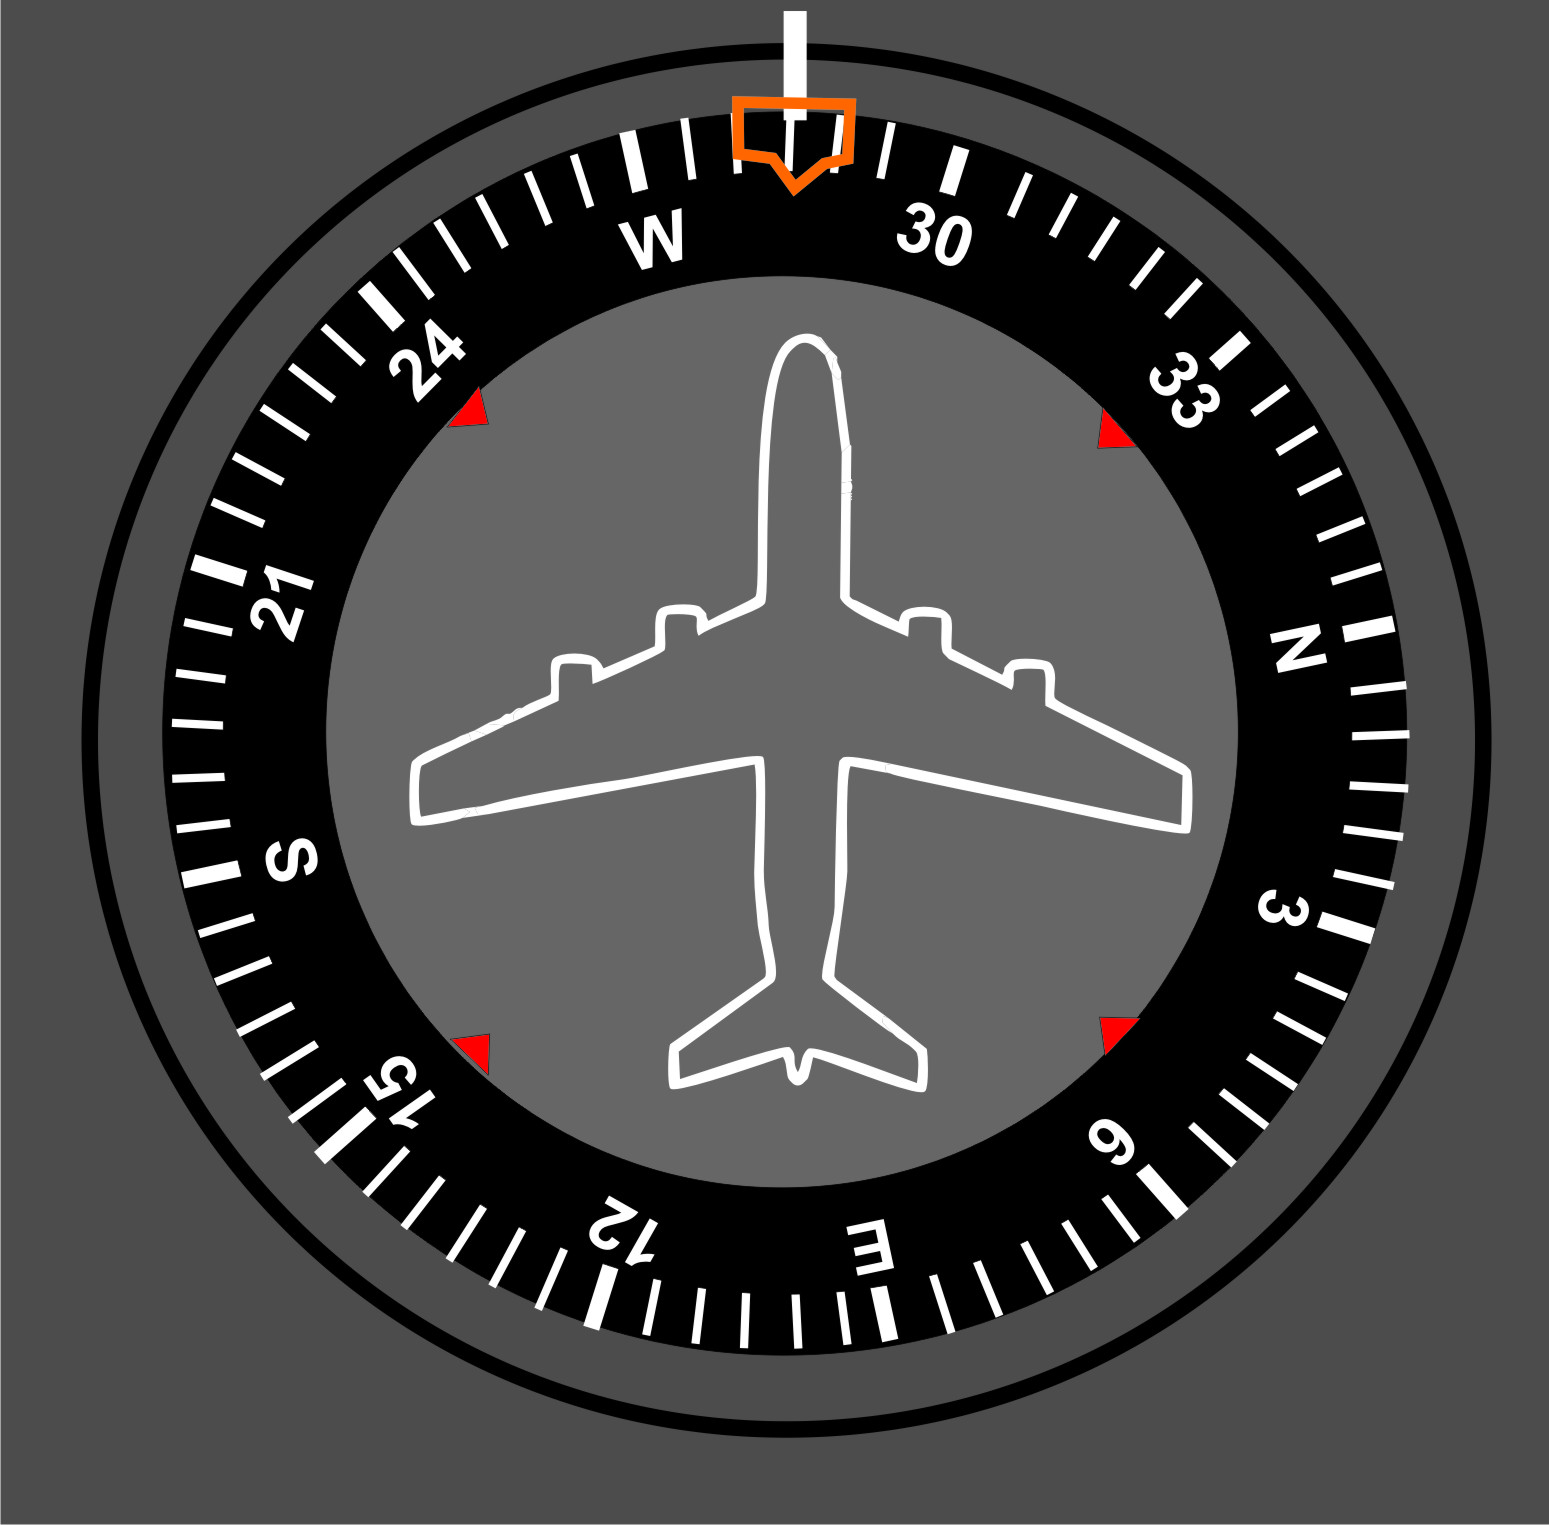
Set the intercept heading on your DI and fly this heading to intercept the radial 060°.
Fly this heading until the needle comes alive, then slowly follow it in to the centralised position, by gradually turning onto the heading of the desired radial.
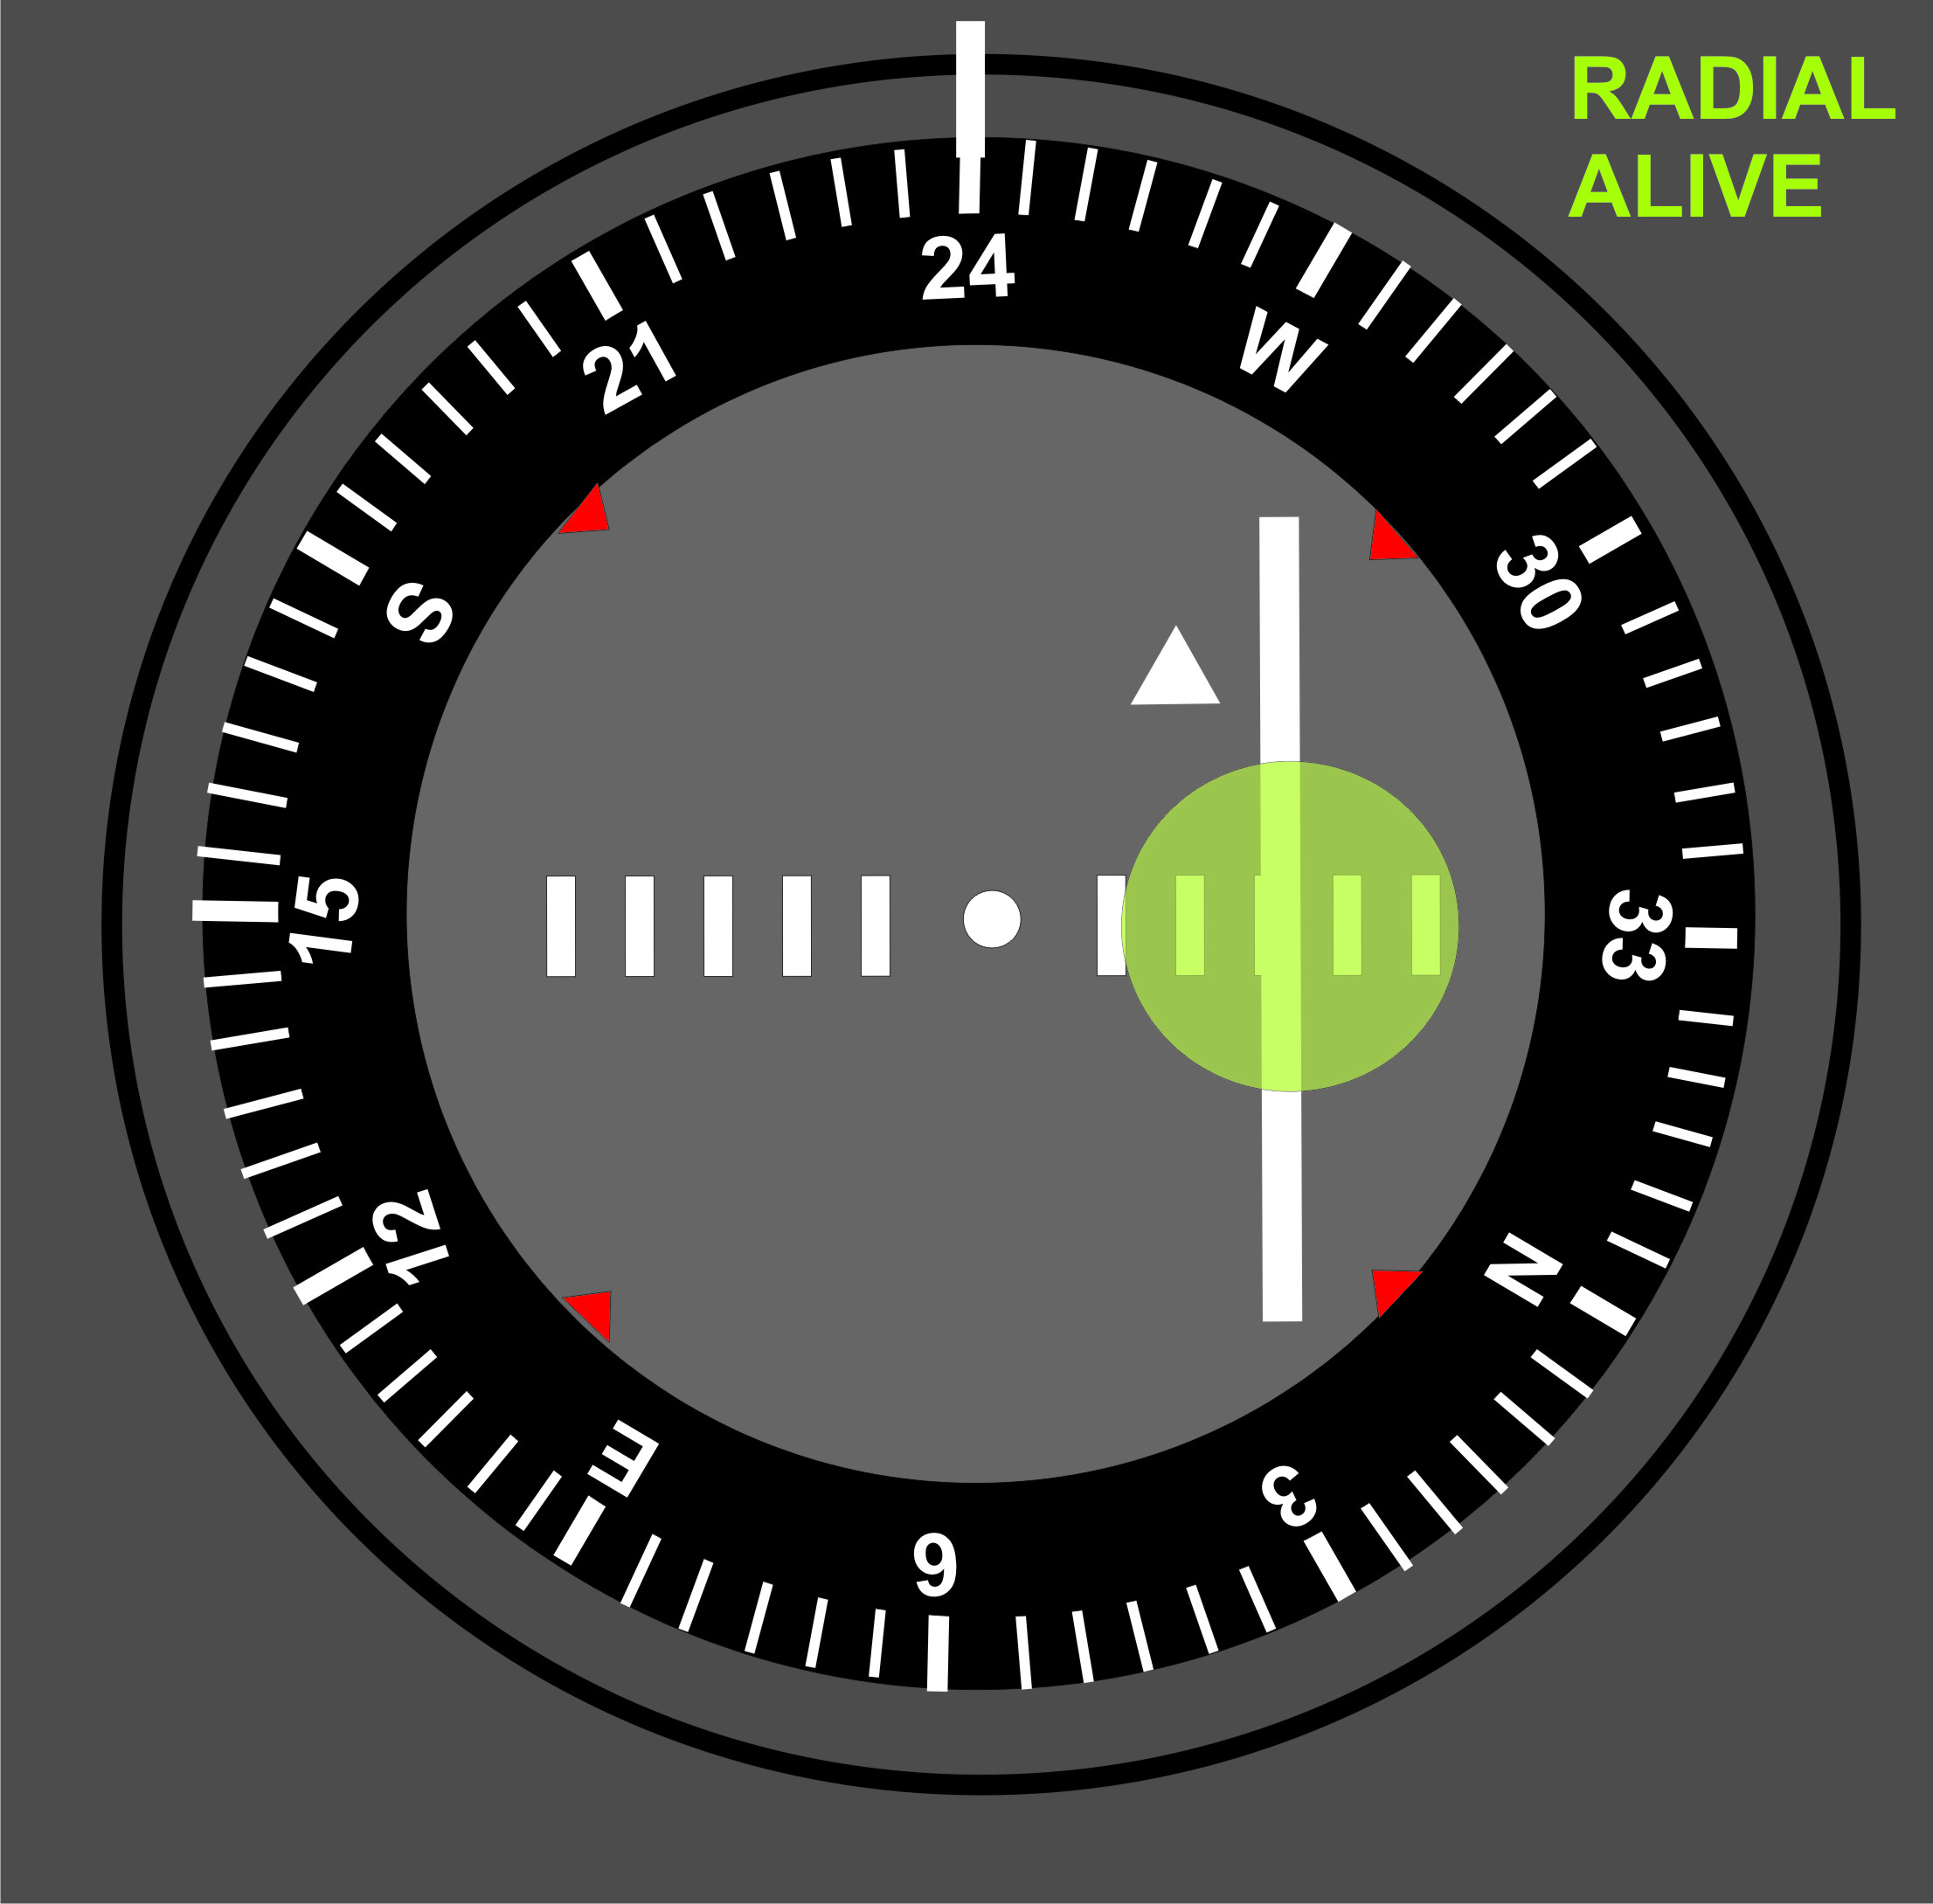
As the radial comes alive, it will start to move inwards towards the central position. The rate depends on the distance from the station.
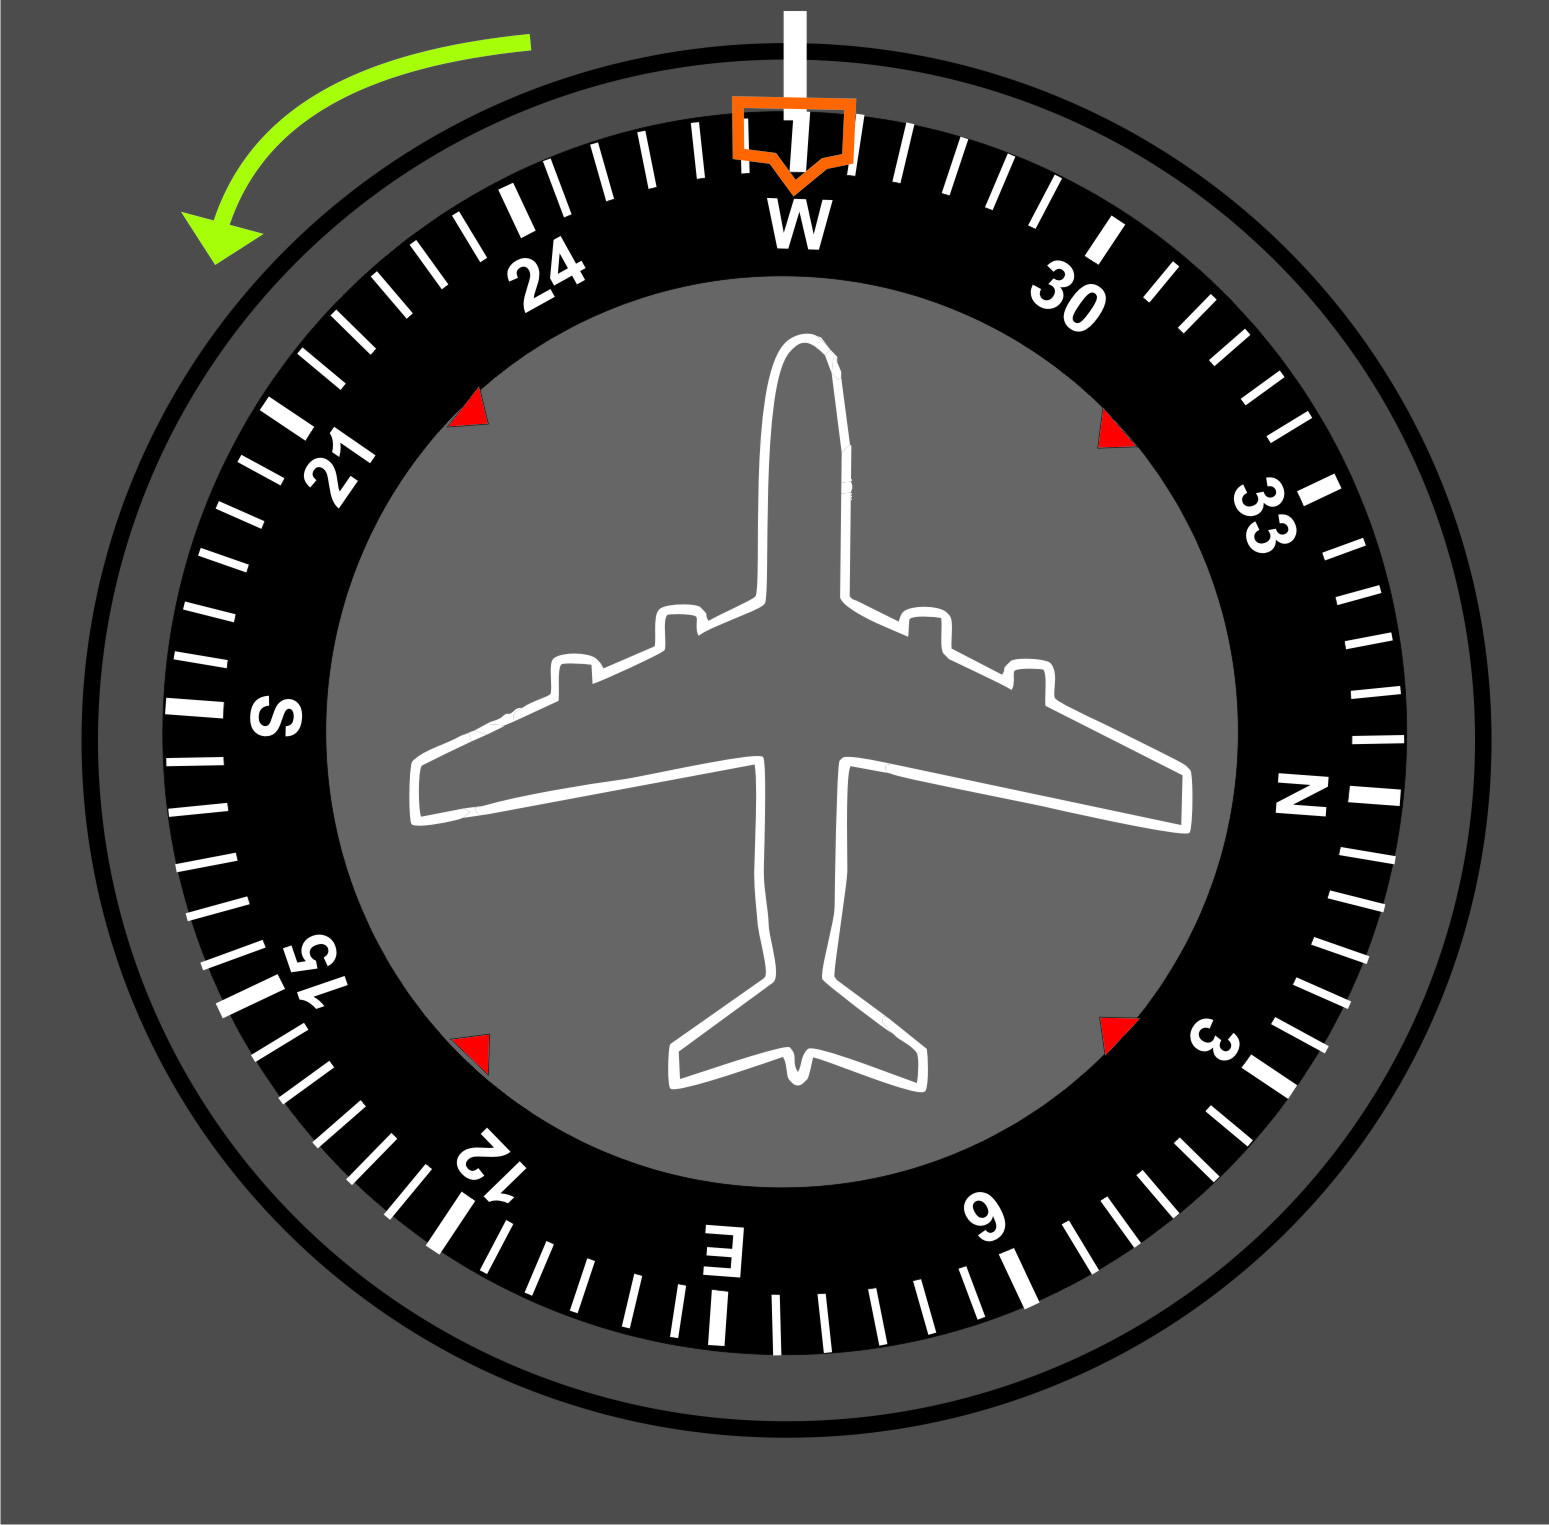
Reduce the intercept heading as the needle starts to move, by slowly turning onto the desired heading which will centralise the needle on the 060° radial
Once centralised, you are established on the 060° radial TO the station. Heading adjustments can be made on the DI to compensate for wind. If the wind is coming from the left, you will perhaps choose a heading of 230° in order to point the nose into the wind. Similarly, if the wind is from the right, you may choose a heading of 250°. Essentially, choose the heading that keeps the needle centralised. As easy as that!
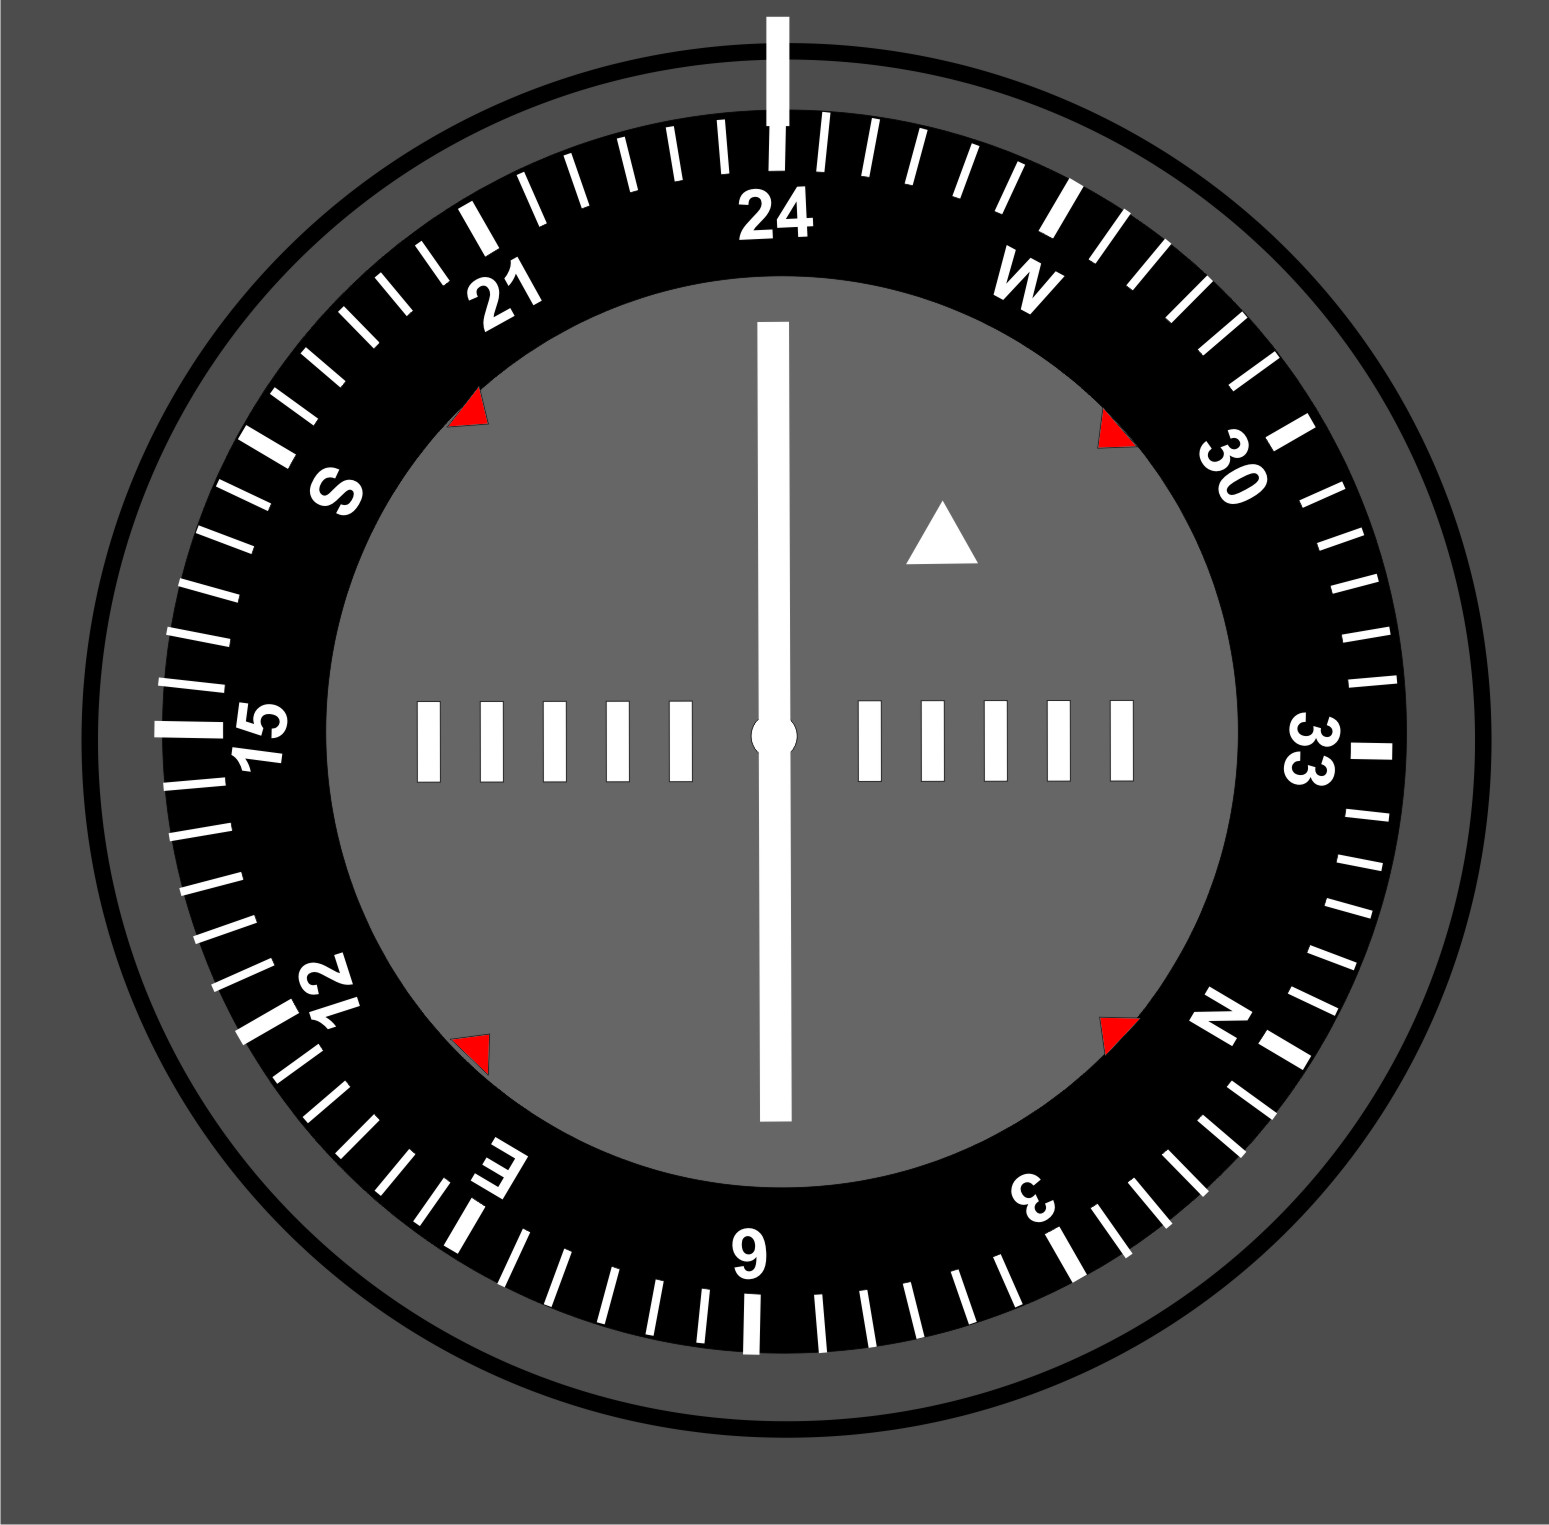
Needle centralised, and aircraft established on radial 060°.
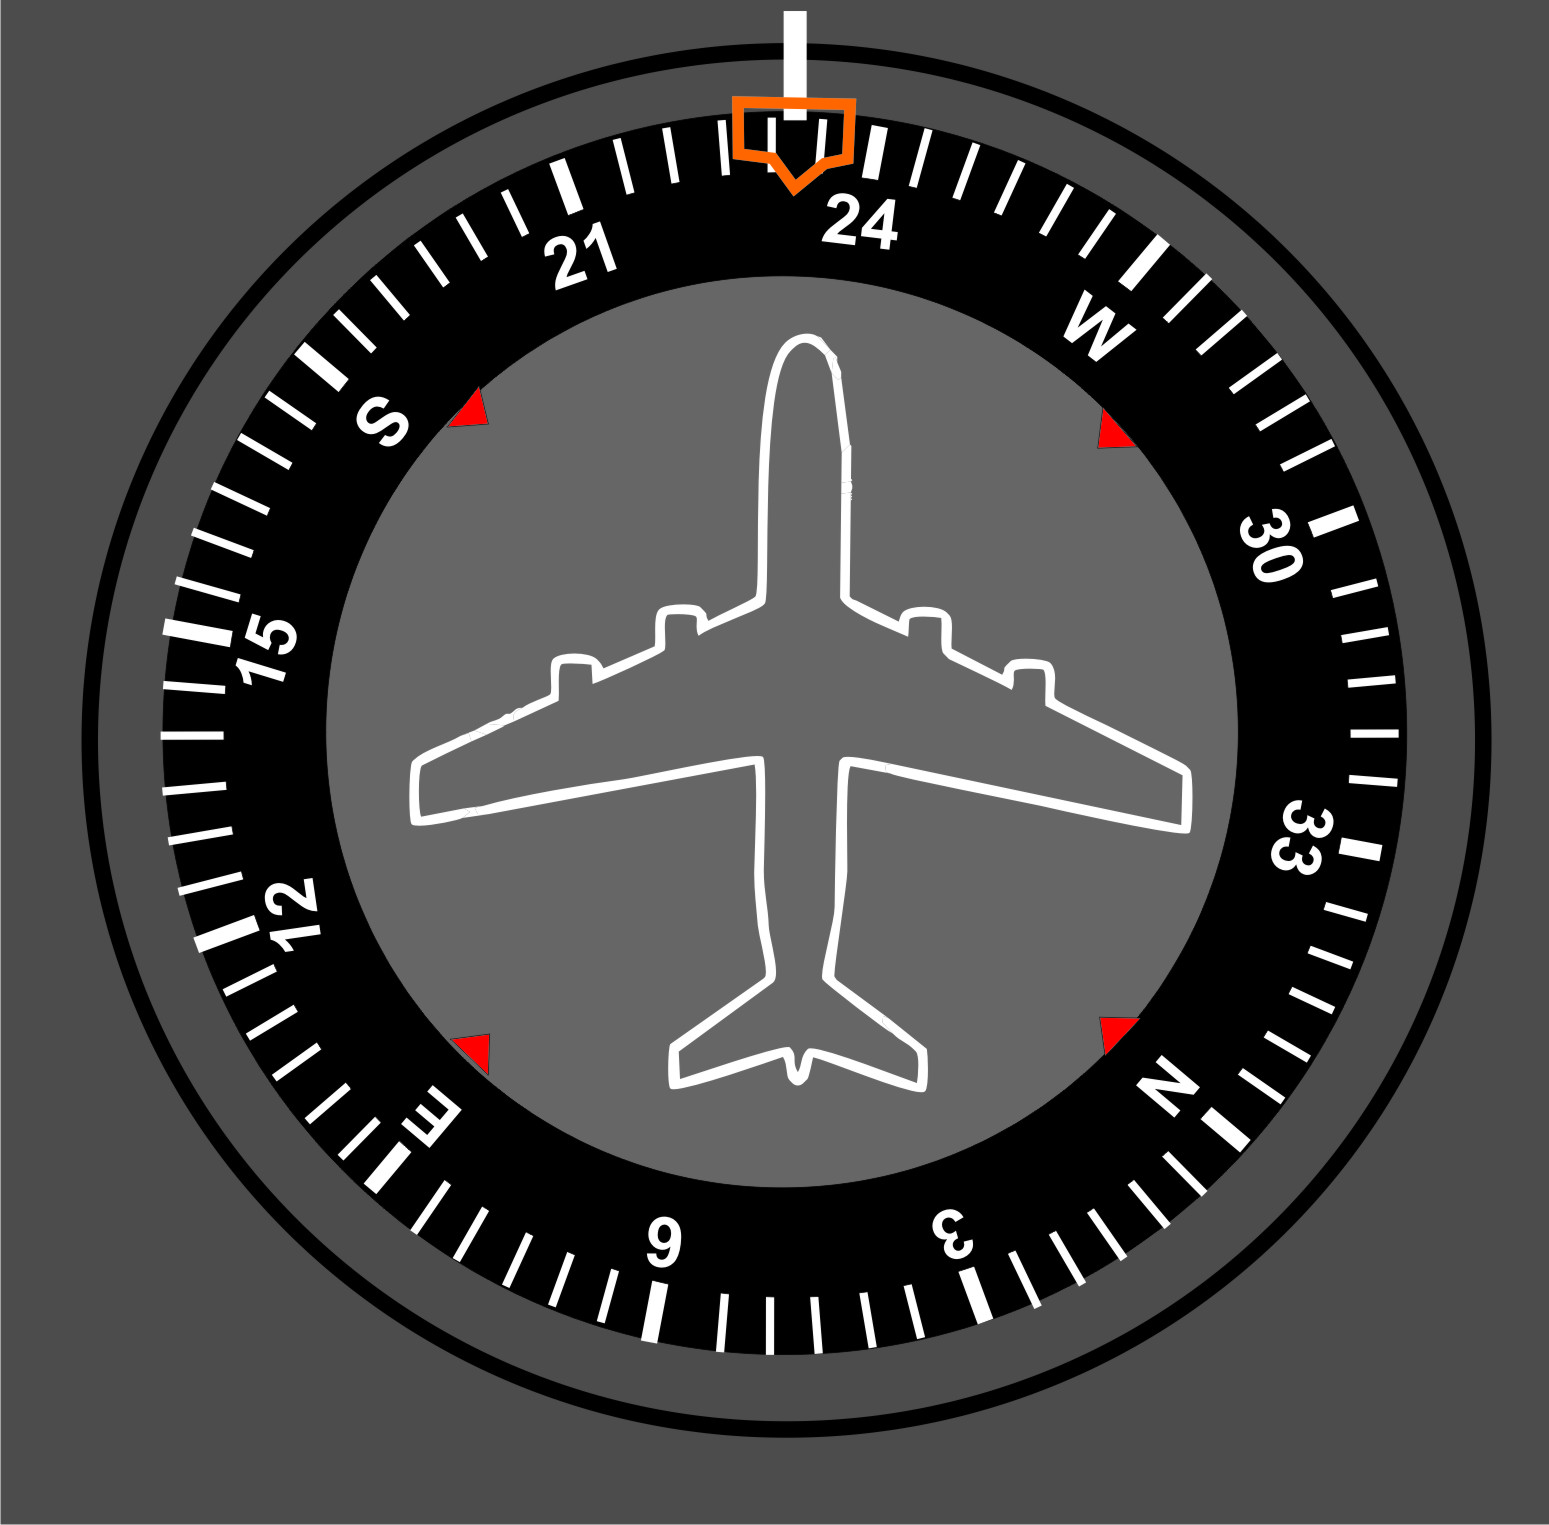
Heading adjusted for a wind from the left.
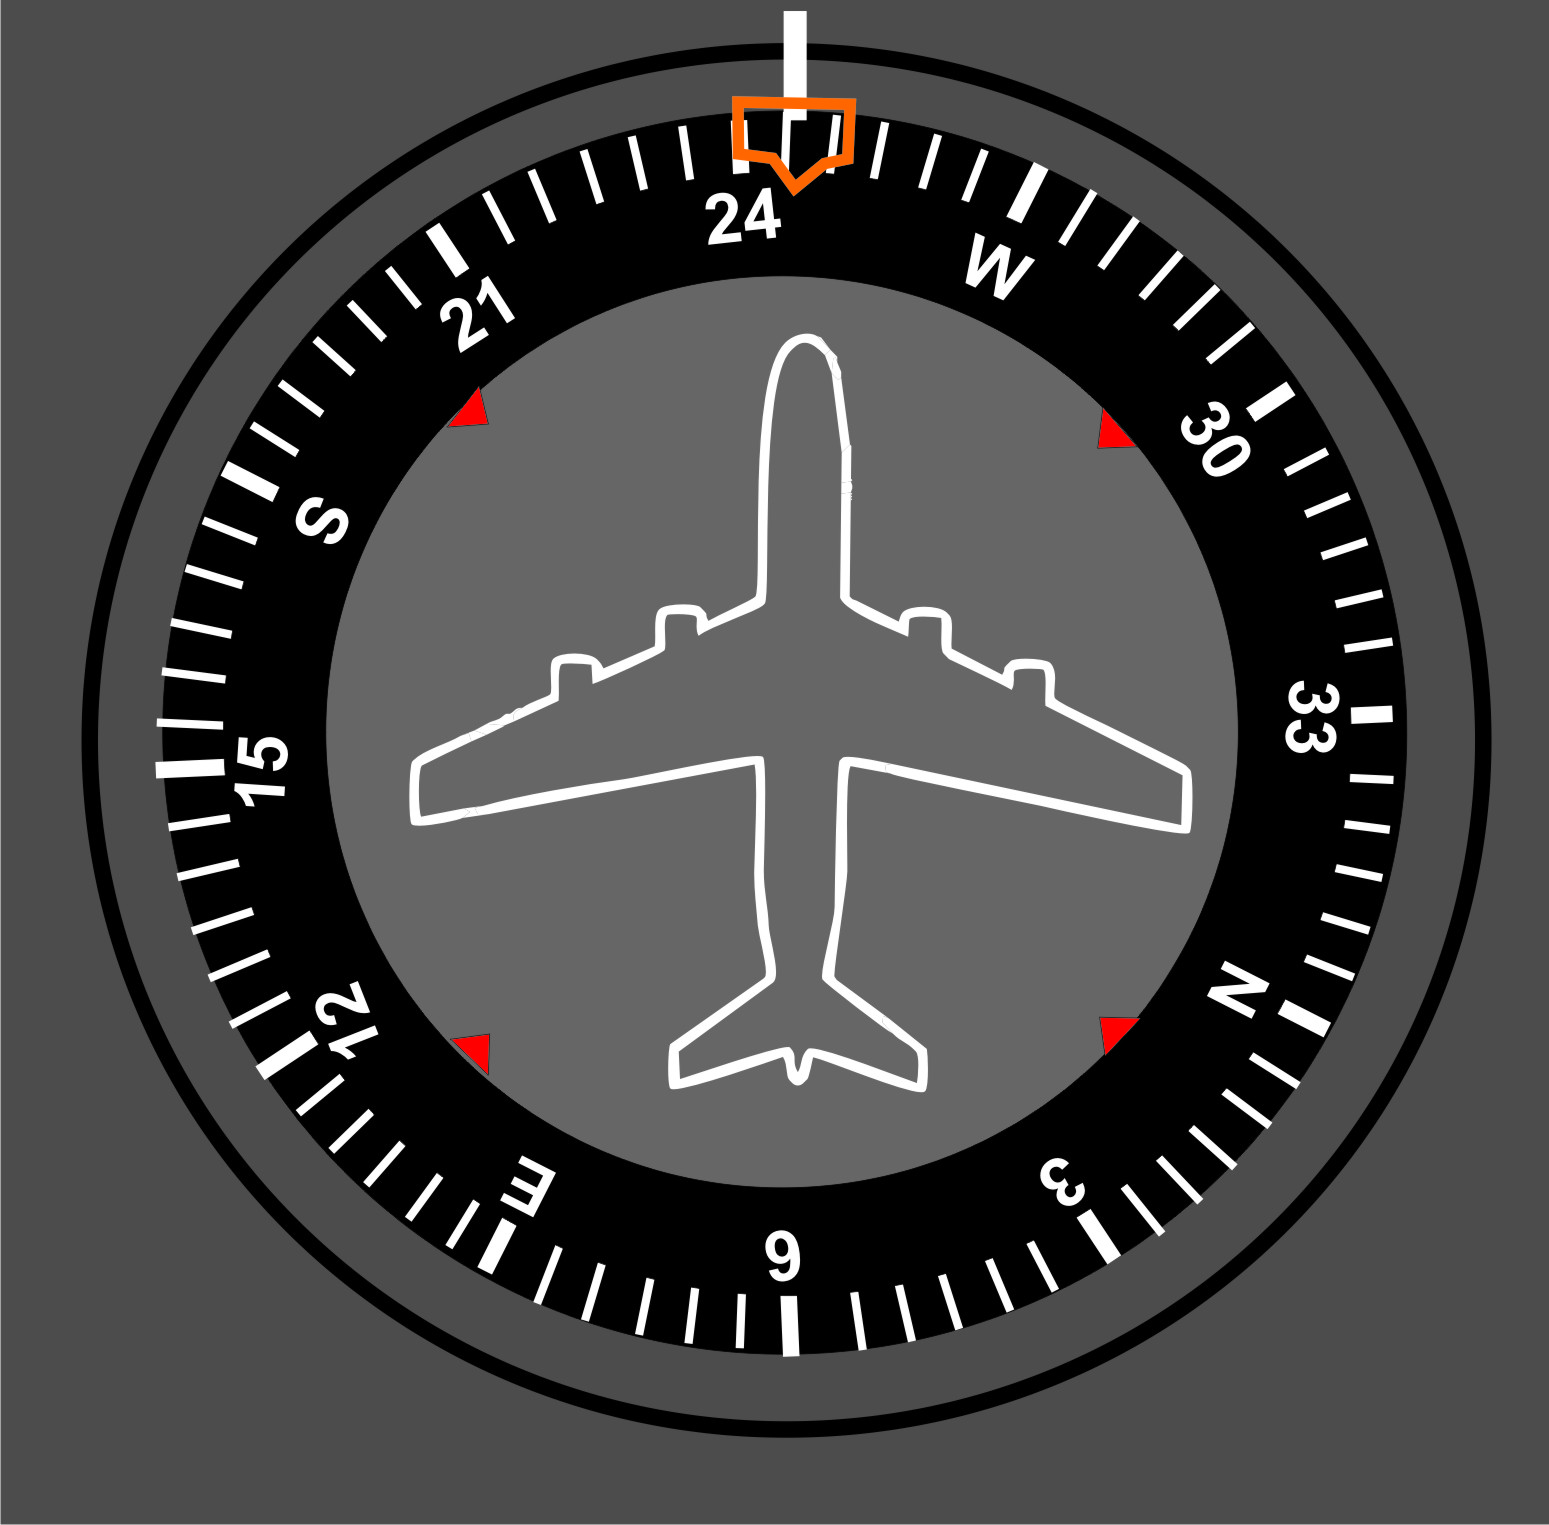
Heading adjusted for a wind from the right.
So there you have it! Next time you fly, instead of flying the boring old GPS, have a bit of fun and fly to a VOR…


thank you so much for this lovely explanation .. you really make flying much easy and more fun !!
Thank you James! We are always looking for new topics, so you are welcome to send in your suggestions!